Ubivox lets you import recipients from Excel and CSV files. The process is the same for both file formats but for simplicity's sake this guide focuses on Excel files.
1) Prepare the e-mail addresses in Excel
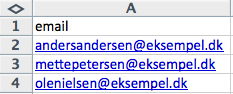
Write 'email' in the first row in column A and insert the e-mail addresses downwards in the same column.
If you wish to import more data than just the e-mail address the Excel file should look like this:

In this example we are importing e-mail addresses, first names, last names and gender. Note that the data fields have to be created in Ubivox prior to import.
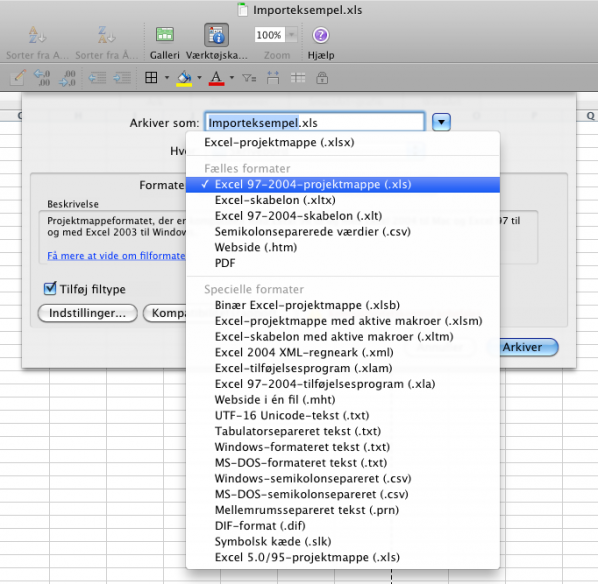
2) Save the file so the file name ends in .xls
Ubivox does not accept .xlsx files so the file has to be saved as .xls. Save the file as an Excel 1997-2003 file on Windows and 1997-2004 on Mac.
3) Lists and recipients
When recipients are imported they are added to a list in Ubivox; this list works as an 'address book'. We recommend adding all recipients to one list, however if you need more than one list you can create as many as you need by clicking 'New' => 'List' in the main menu in Ubivox.
You can find a view of all your lists on the Dashboard.
4) Go to import
Click Lists & Recipients in the main menu and click Import. Click Create new import job.
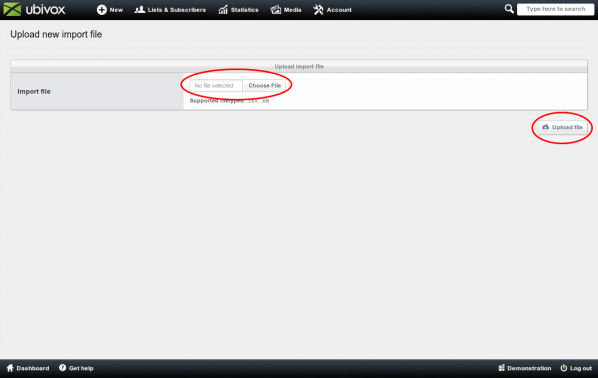
5) Choose the import file form your computer and click Upload file
6) Configure your import job
Choose the list you want to import your recipients to. Afterwards fill in consent details - describe in which situation the recipients signed up or have been signed up. Detailed consent information will help Ubivox to quickly handle any complaints from recipients.
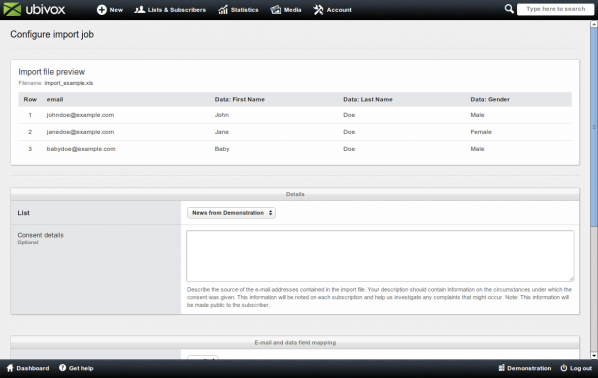
You now have to tell Ubivox where in the import file the different recipient data are. First, choose the column containing the e-mail address.
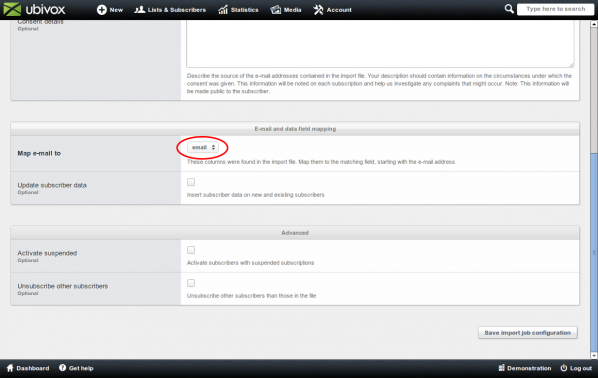
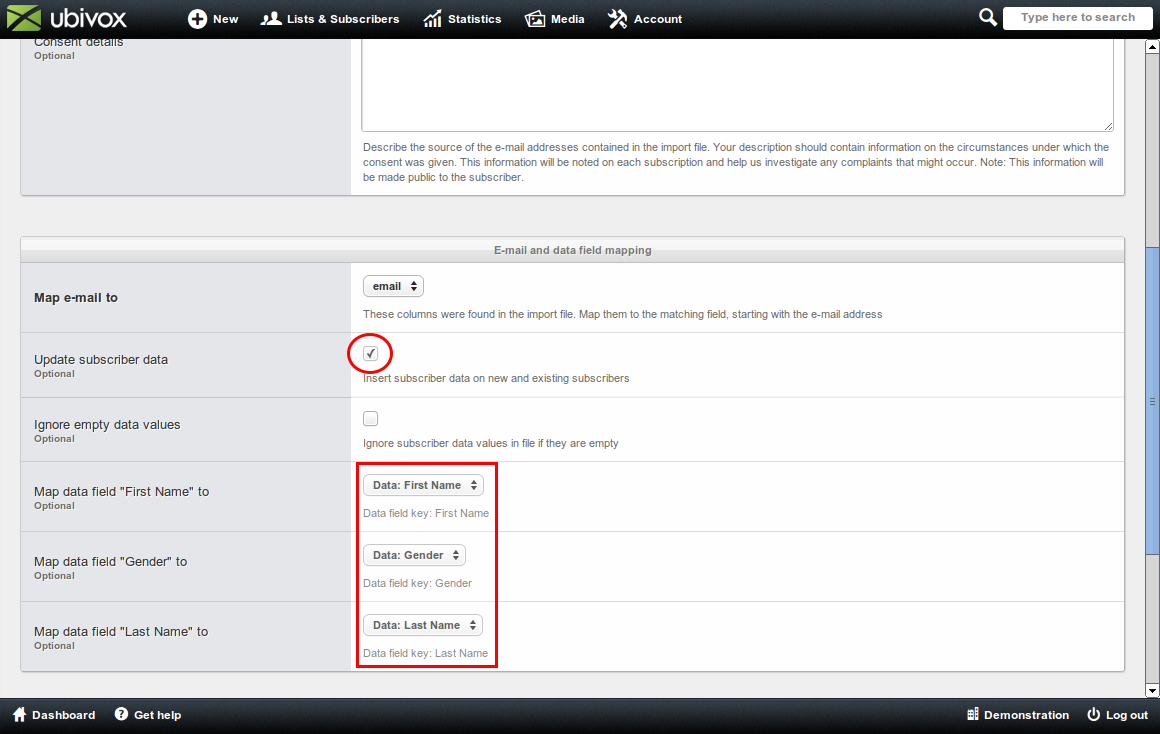
If you wish to import additional data aside from the e-mail address, check the box Update subscriber data. You will now be able to choose which data fields on the account match which columns in the import file.
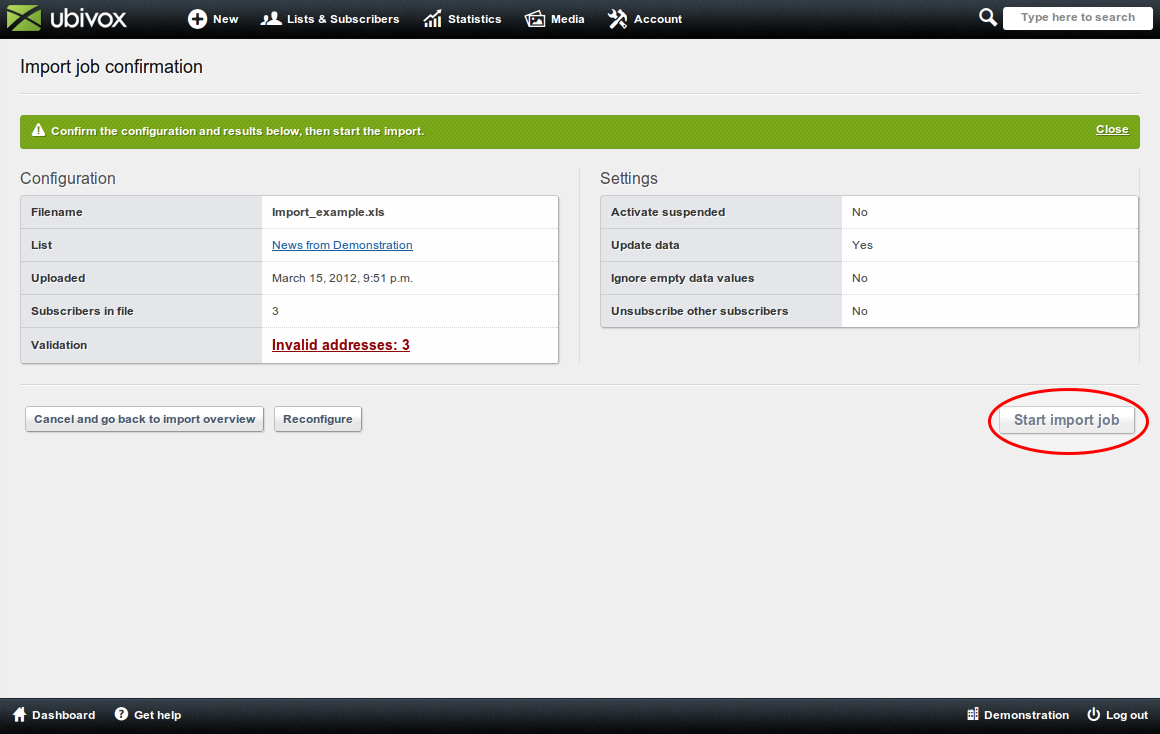
Save the import configuration - you will now be taken to the next step where you confirm the settings. If Ubivox finds too many errors in the import file or there are other problems relating to the import you get the option of going back and uploading a new file.
Start the import job - the recipients will now be imported.
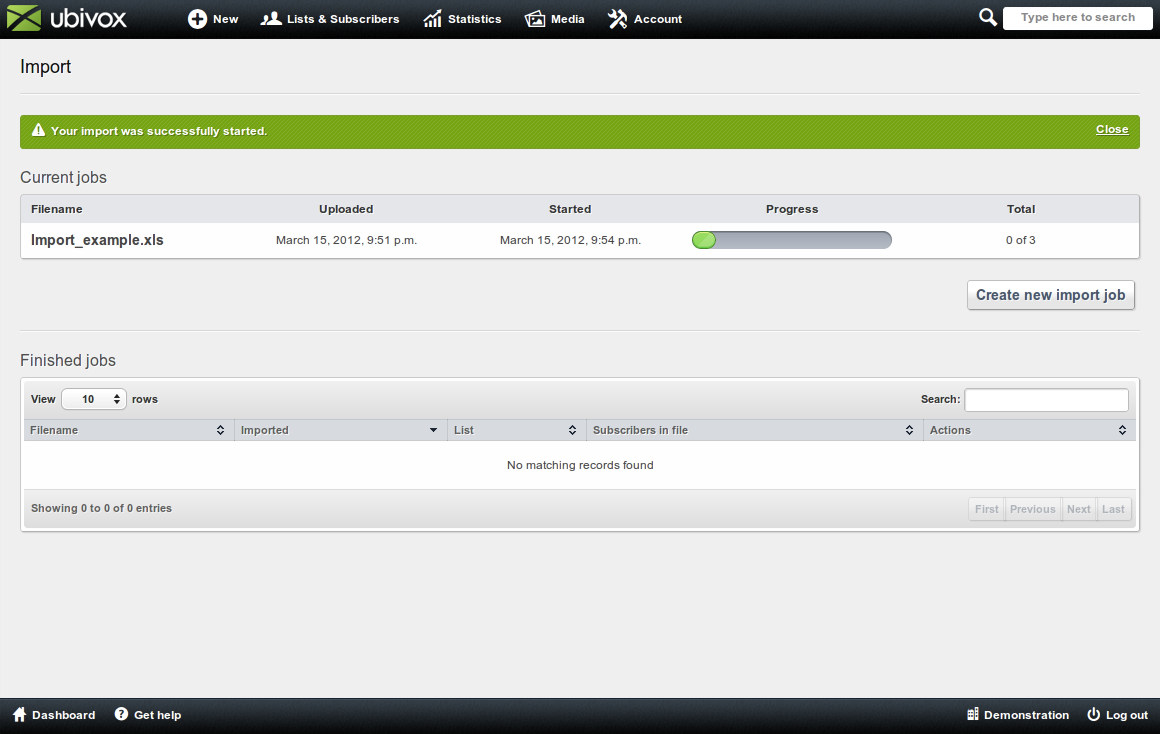
7) The recipients are being imported
Through the green bar you are updated on how far the import process is. You may leave the page and even log out from your account if the import is taking a while to complete. You will get an e-mail when the import is done.
8) Check the result
When the import is complete you can check the result to see how many recipients were added to the list.