There are 3 ways to insert a web form on your website.
- Only a link
- HTML code on the website, and using Ubivox' default confirmation pages.
- HTML code on the website, and you create customized confirmation pages. (Recommended)
1. Link from website to standard generic sign up site (quick version)
In this version, you only need to choose data fields and create an Opt-in e-mail.
2. HTML code on your website, and auto generated confirmation pages
In the 2. version you have to setup data fields, Opt-in and insert the HTML code on your website. You do not need to create landing pages after signup.
3. HTML code on your website with your own confirmation pages
Recommended
We recommend to use the 3rd version, where you make your own landingpages. You need to create everything here yourself, and insert the links into Ubivox.
The only thing auto generated in this version is the unsubscribe link, whick is always automatically generated in the standard template in Ubivox.
You can always delete the default one, and insert it another place in the newsletter using mailmerging
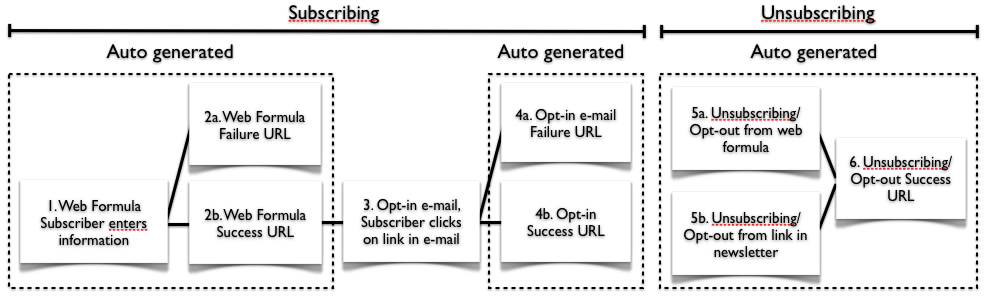
How to create the web formula
A subscription takes place (1. web formula), when a visitor on your website enters an e-mail address and maybe other information, which is defined by the data fields in the system. see guide about data fields. When this is done, then the subscriber is directed to a success or failure landing page (2a+2b), and they will receive an Opt-in e-mail, in which they have to confirm their subscription by clicking on a confirmation link (3. Opt-in e-mail). When clicking this link, they will land on a success/failure page (4a+4b). This process is called double opt-in.
To unsubscribe, the subscriber either enters information on the websites Opt-out form (5a.), but often it is done through the unsubscribe link in the newsletter sent (5b.), either way, they land on a landing page confirming the unsubscription (6.).
Knowing the processes of the subscription/unsubscription, we can now get started.
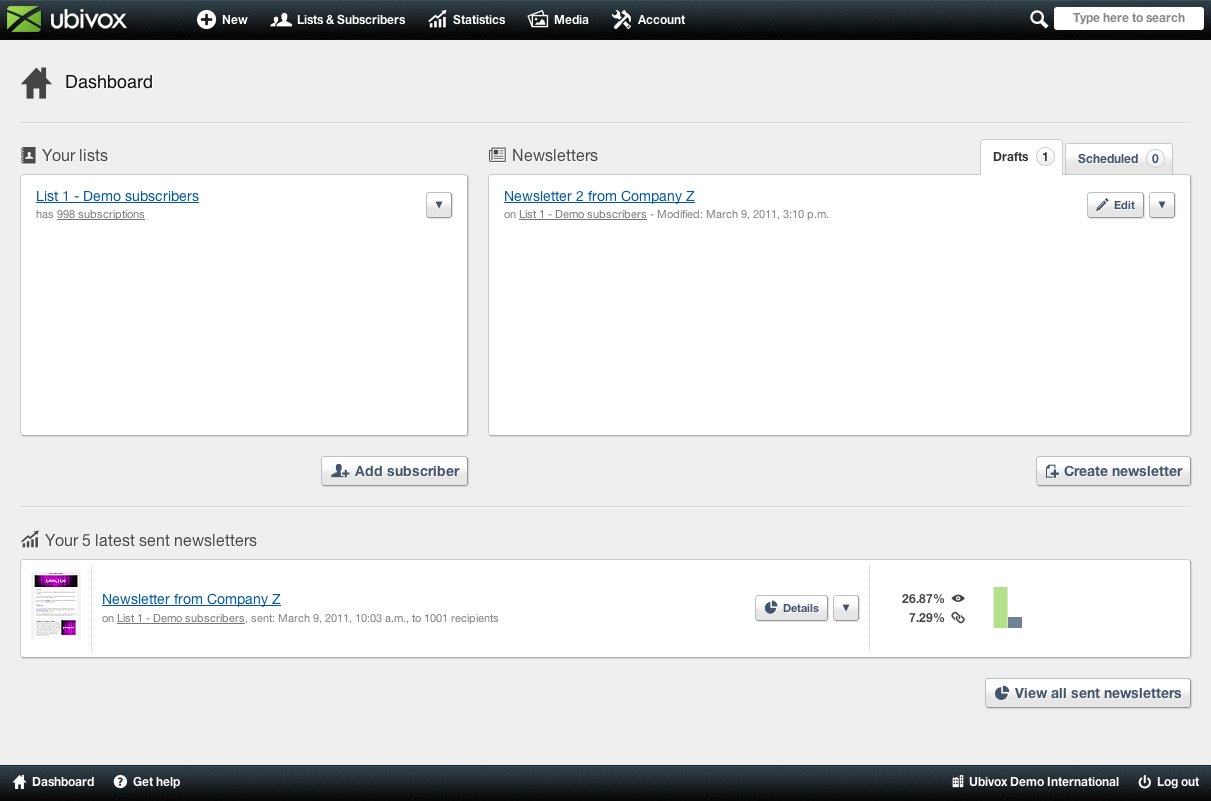
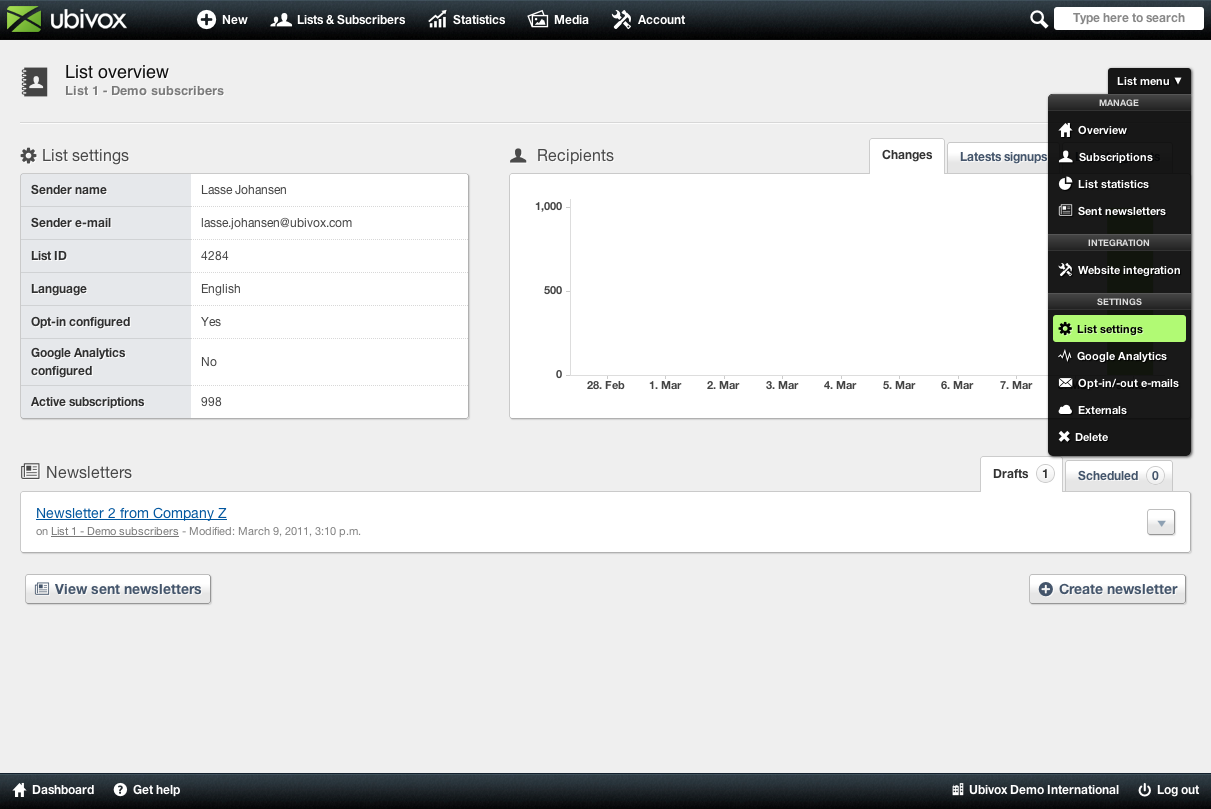
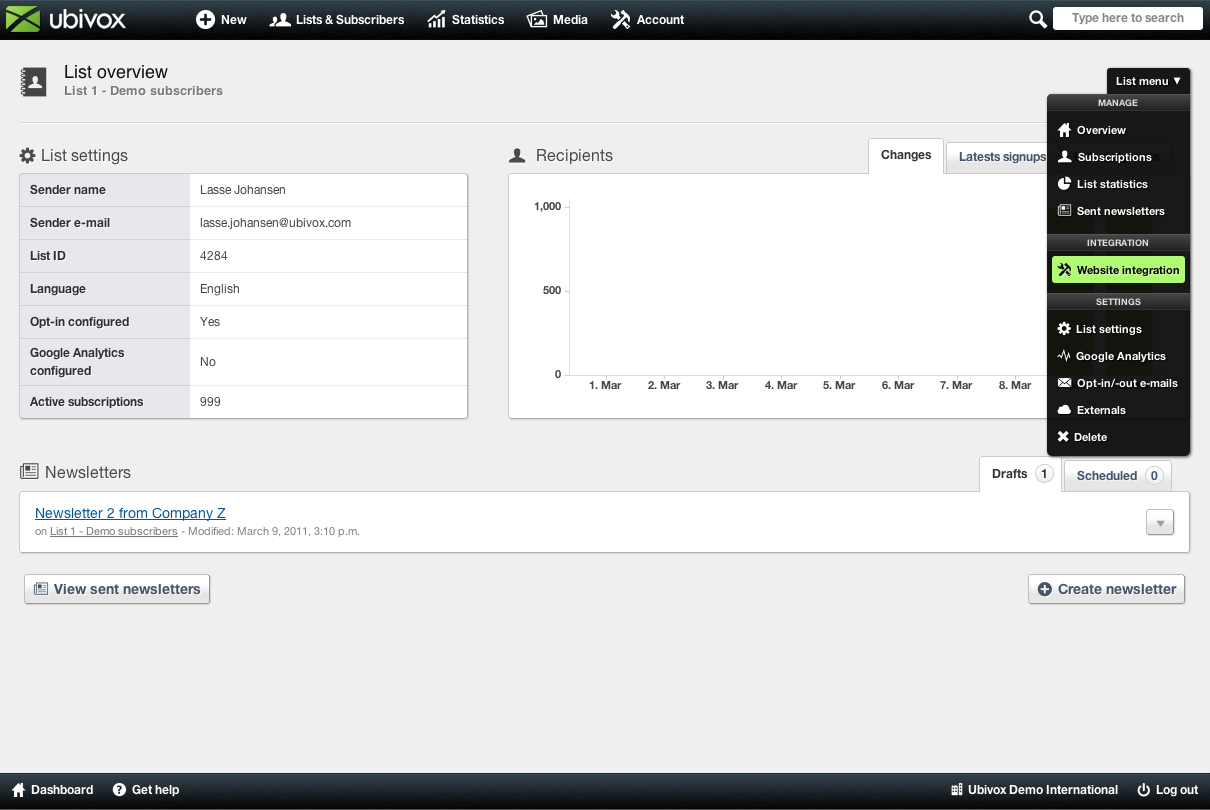
From the dashboard you can always see your newsletter drafts, planned, and recently sent newsletter, and all your lists. Click on the list, that you would like to create a web form for.
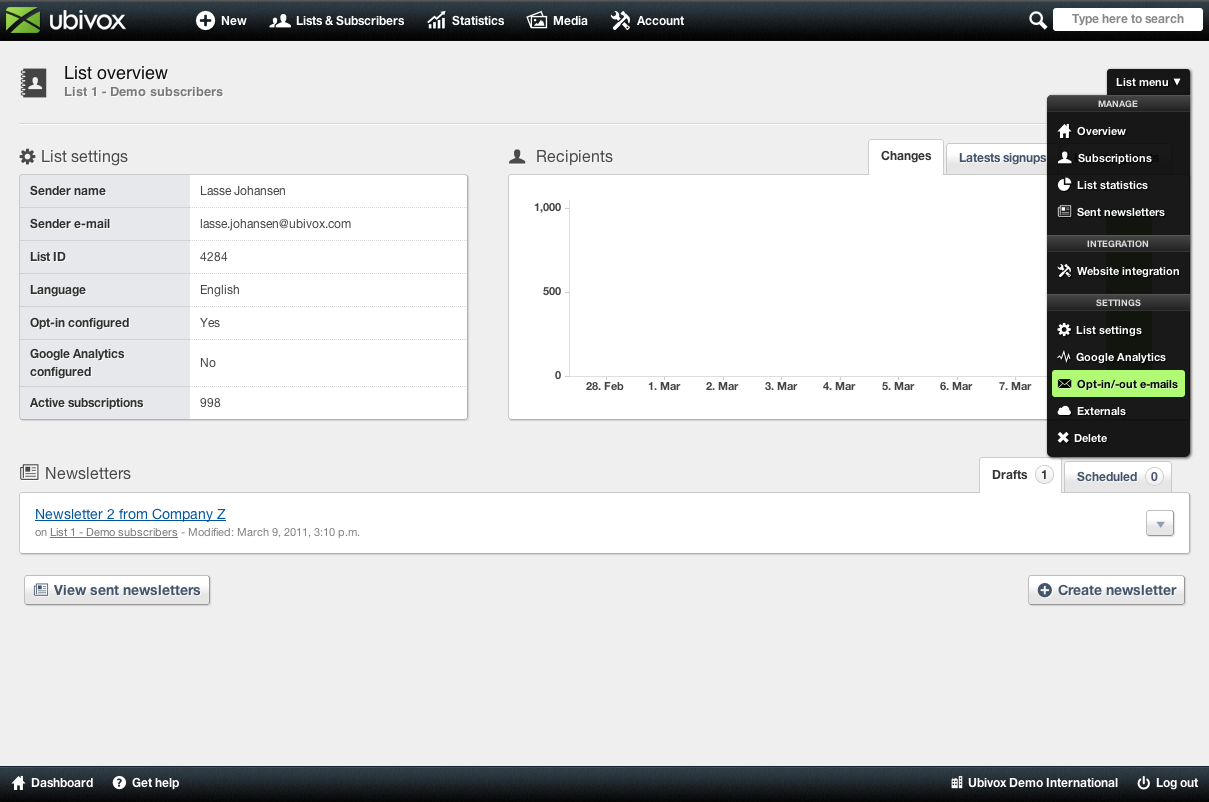
You then enter the List overview, where you get access to your list information. To setup the web form, you have to setup the Opt-in e-mail. Click on the List menu -> Opt-in/out-e-mails.
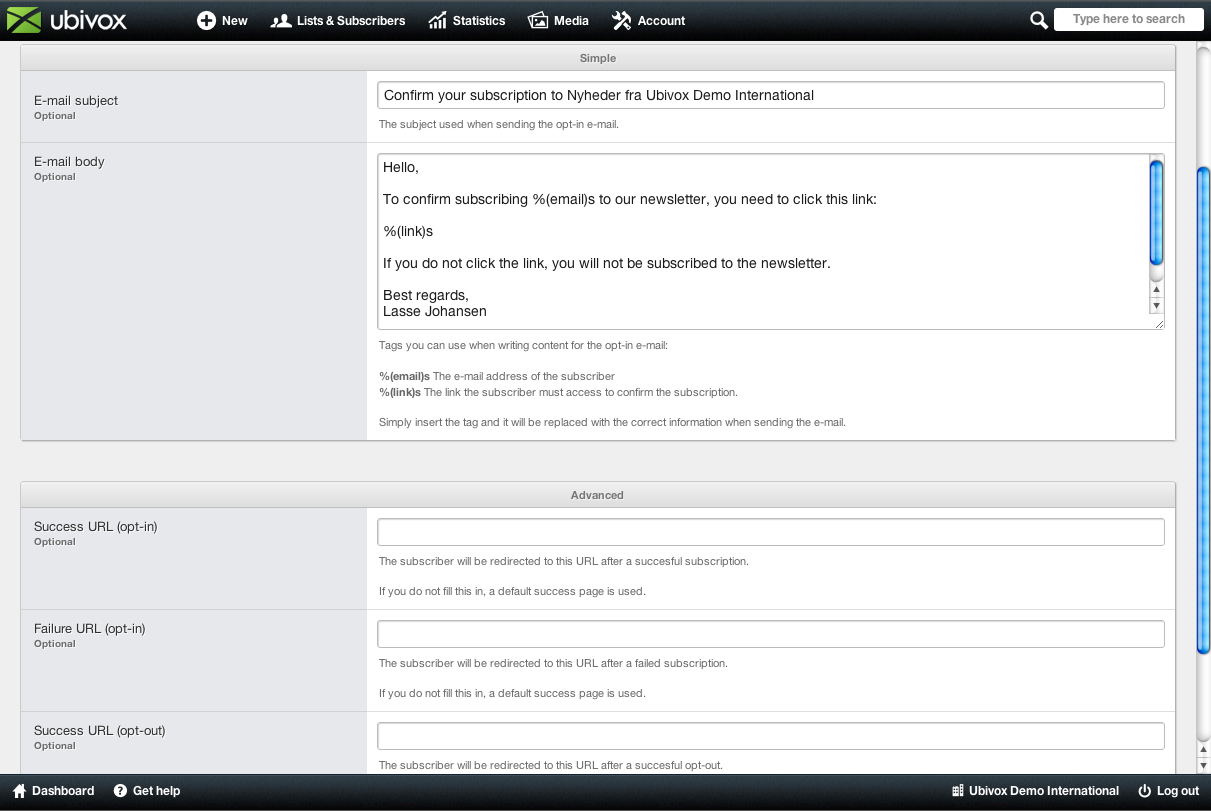
You can choose to just fill out Simple. It contains a standard text, which can be modified if necessary.
Optional
If you wish to define your own landing pages, which the subscriber will enter, when clicking the confirmation link, being the confirmation of subscription, The subscription failed, Confirmation of the unsubscription, this can be done under Advanced, which is below the Simple setup.
If nothing is entered into the advanced settings, the default pages in Ubivox will be used. This can always be modified later.
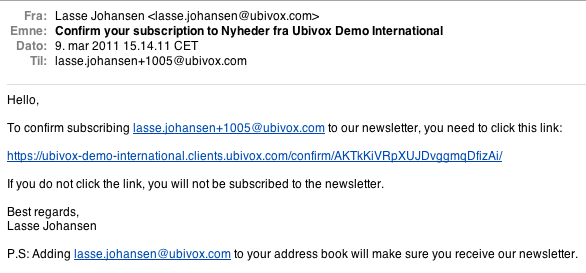
The opt-in e-mail the subscriber receives looks like this:
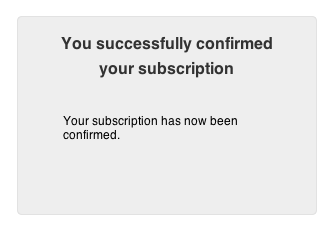
The neutral default pages in Ubivox look like this.
Confirming the opt-in, when clicking on the link:
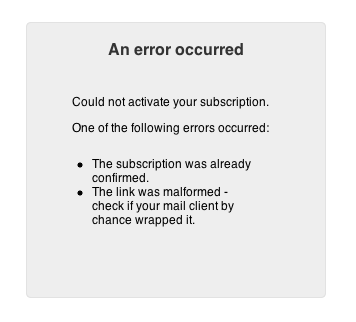
Failure URL when confirming the link, in case an error occurs.
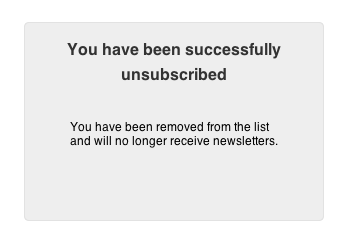
Succesful unsubscription from the newsletter.
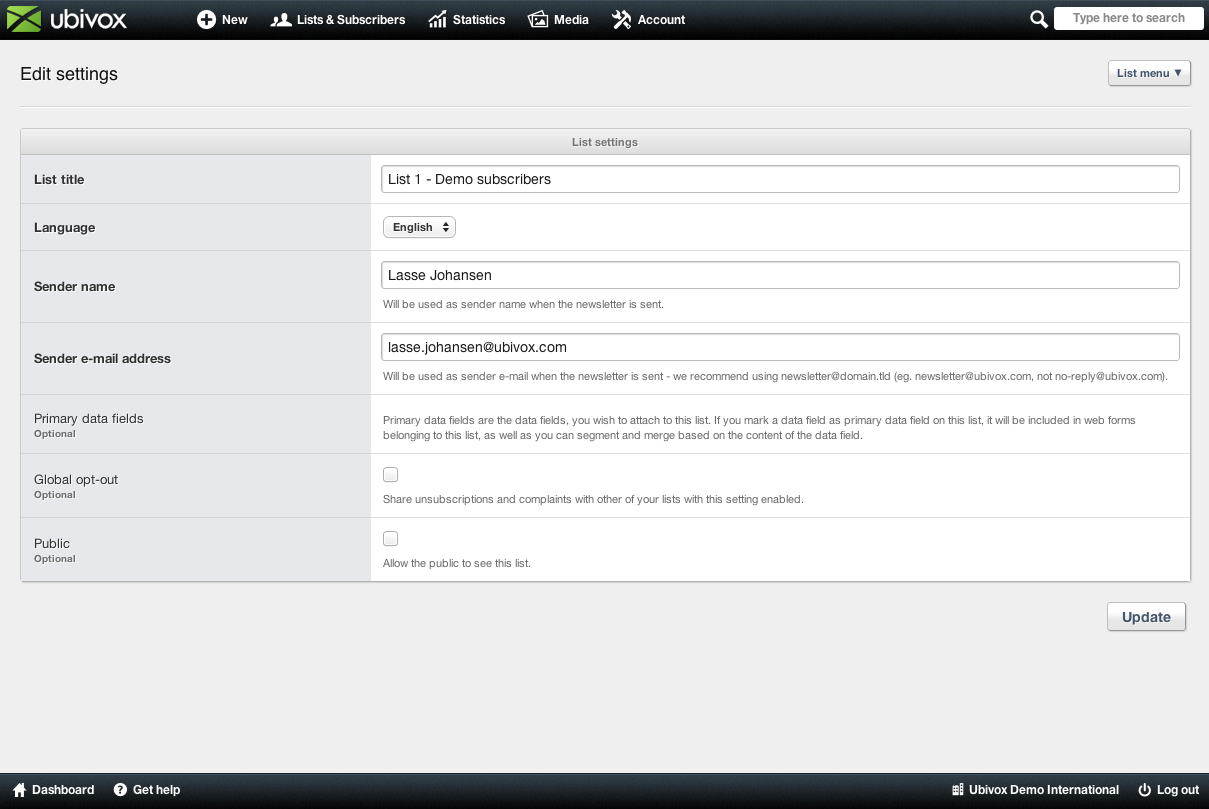
After setting up the Opt-in e-mail, you are returned to the List overview, from where you can choose which data fields that are to be shown in the web form, by clicking List menu -> List settings.
In List settings you can choose, which of your data fields, that you want to be visible in the web form. (requires that you have created data fields). If you do not choose any fields, then it will only be the e-mail address, that is visible in the web form.
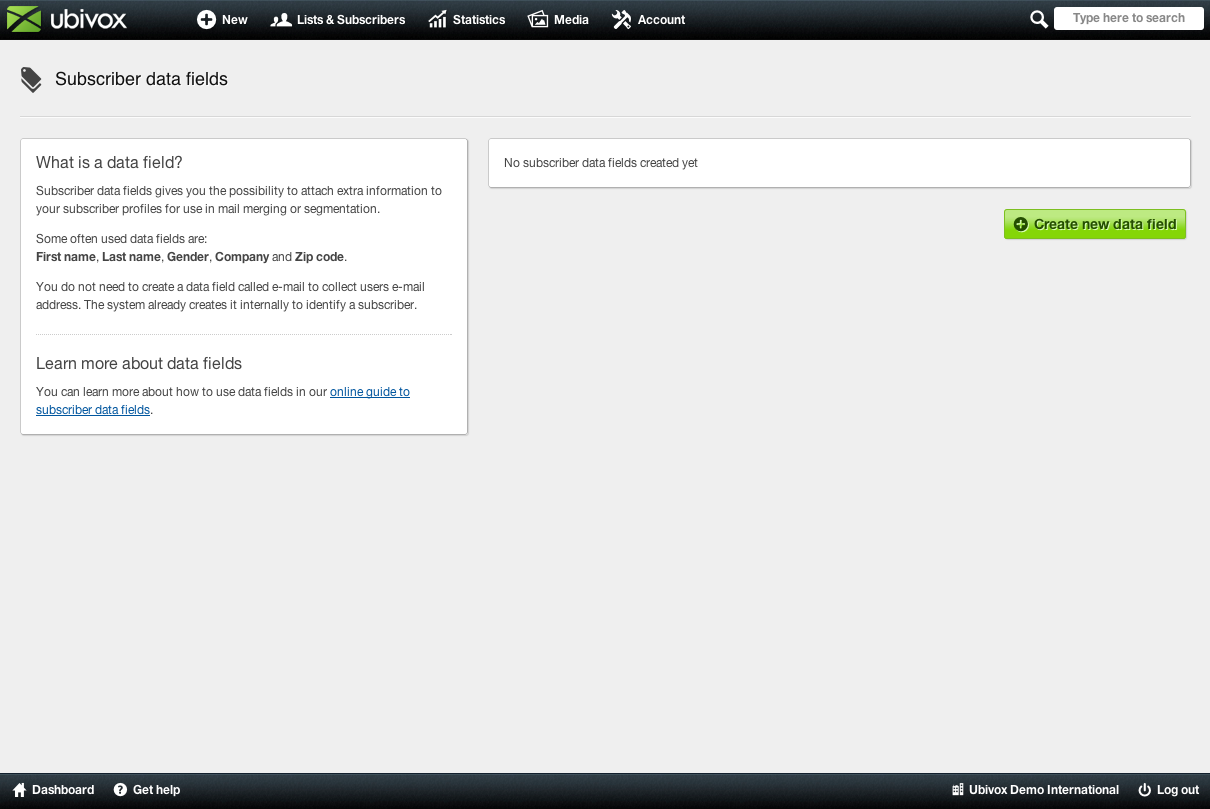
You create data fields as follows.
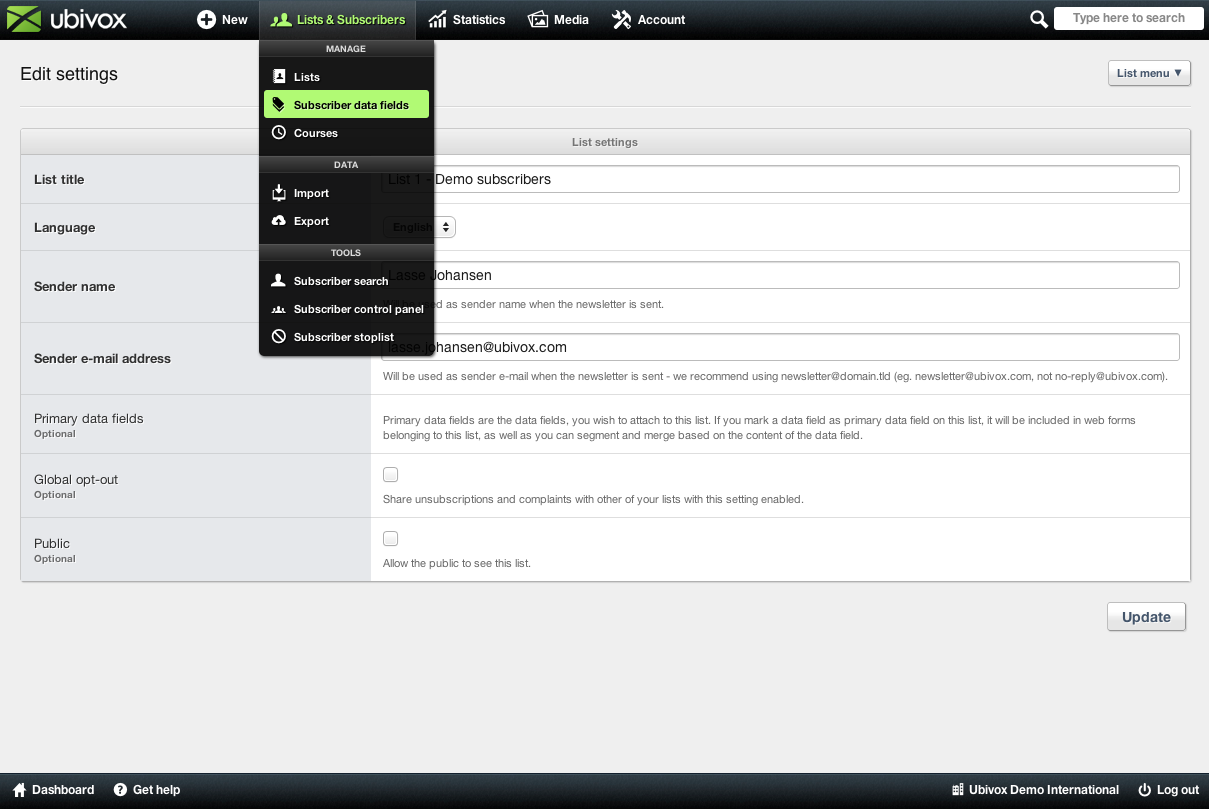
Click Create new data field
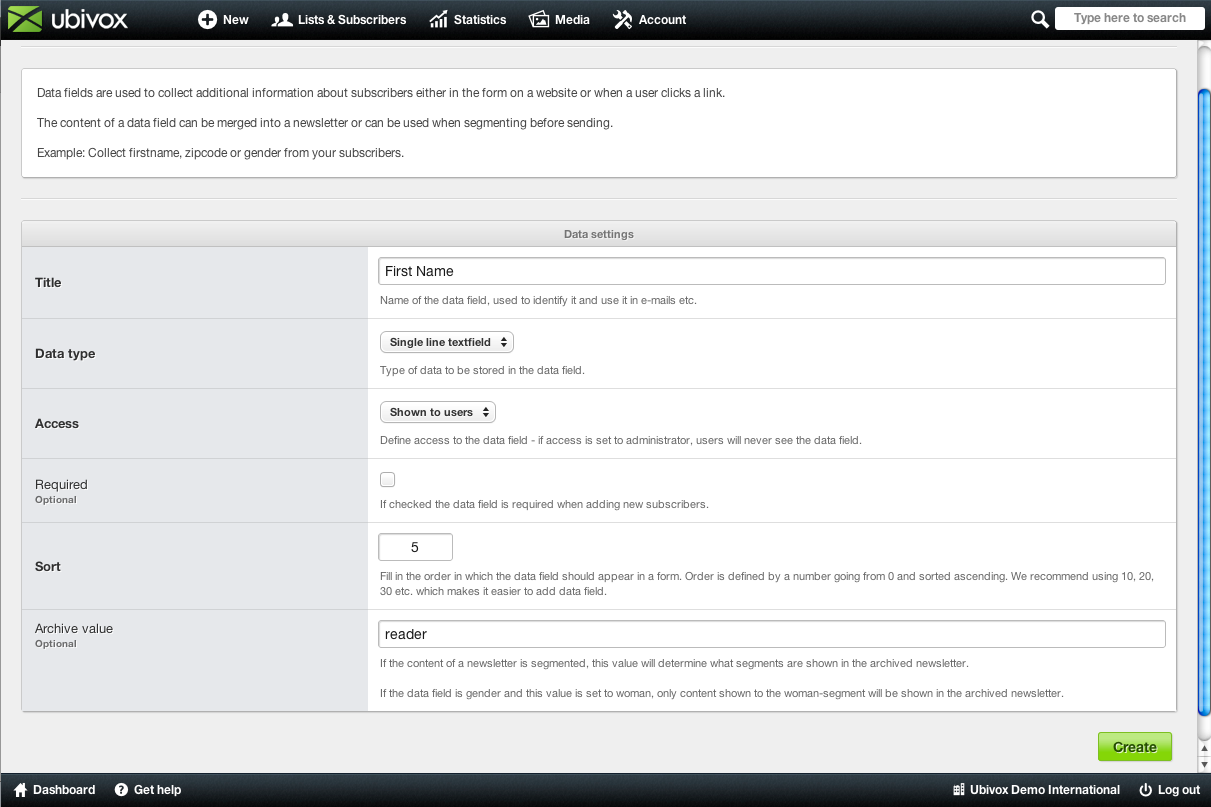
Fill out the boxes, and press Create.
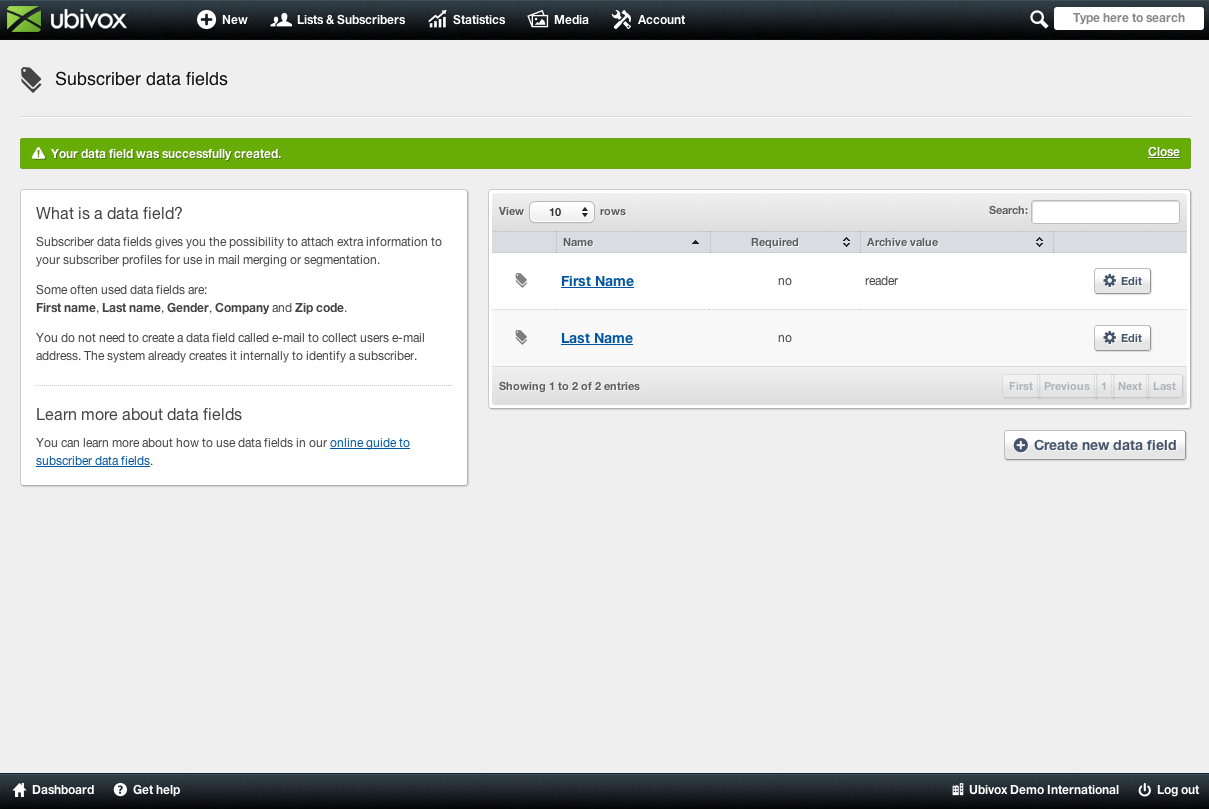
The data fields First Name and Last Name are now created.
Then go back to the list settings Dashboard -> Click on the list name -> List menu -> List settings, and the data fields will now be visible in the settings menu. Choose the ones you would like in the web form.
If we for instance choose First Name and Last Name, as shown, then they will also be visible. (When creating the data field, you can choose whether the fields should be required or not, and also the sequence).
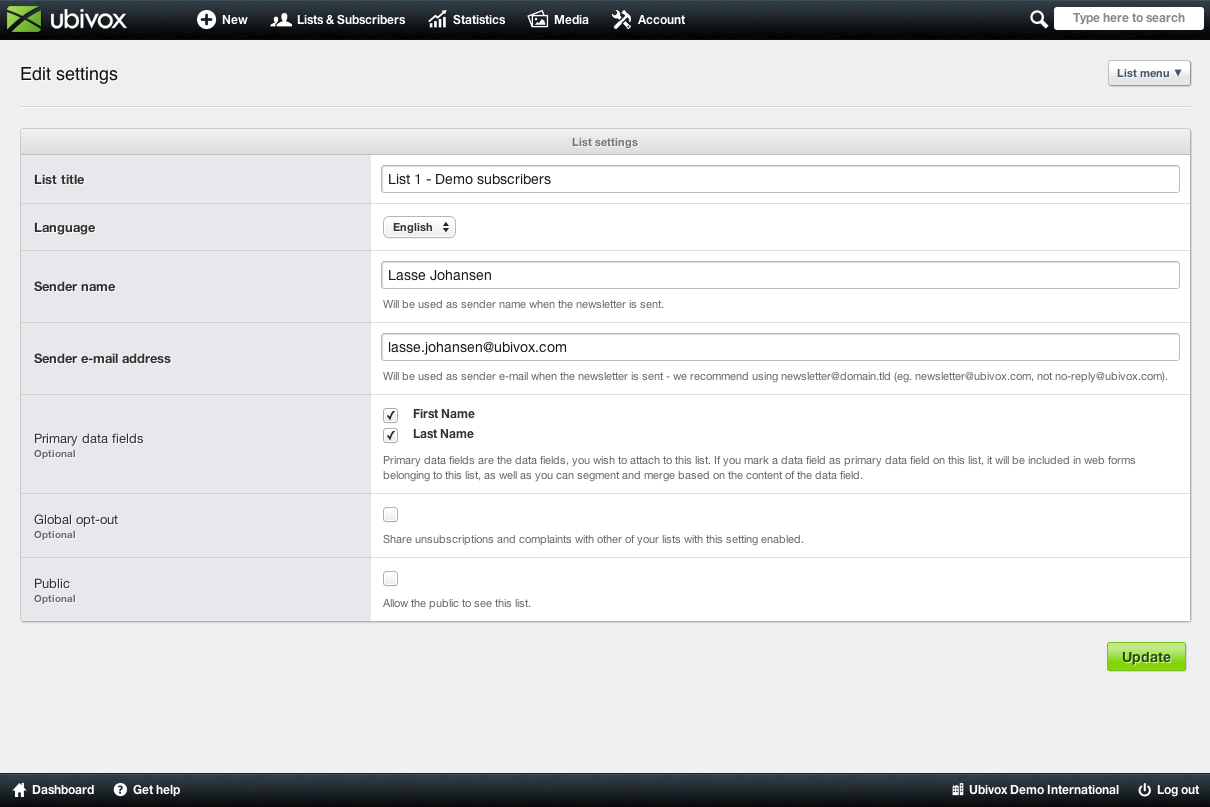
Click Update, and the changes will be saved, and you are bare to list overview again. Then go to List menu -> Website integration.
Here you can see you subscriber link, which can be inserted in e-mails, or on your website, i.e. added to a button Subscribe to our newsletter.
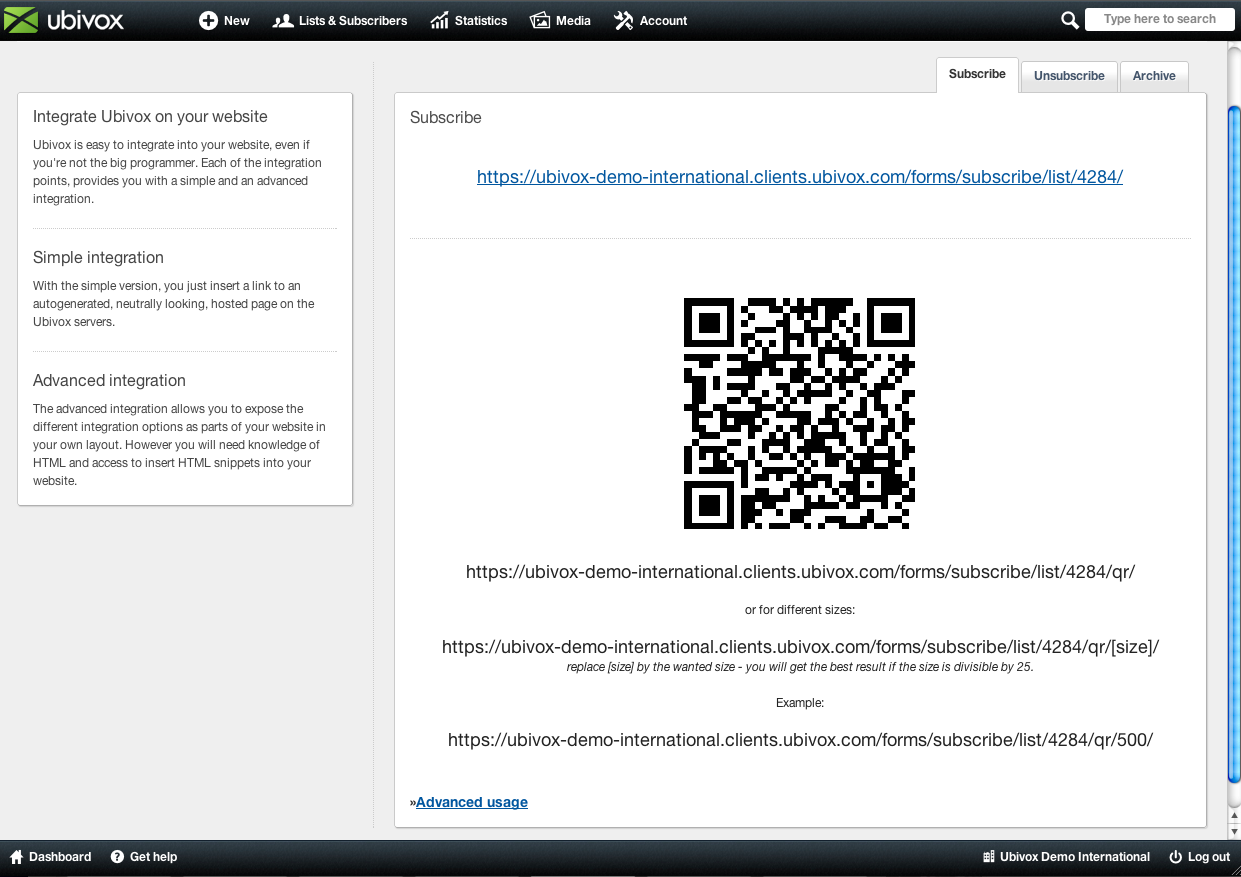
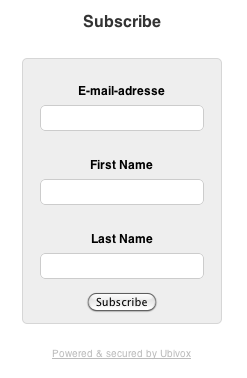
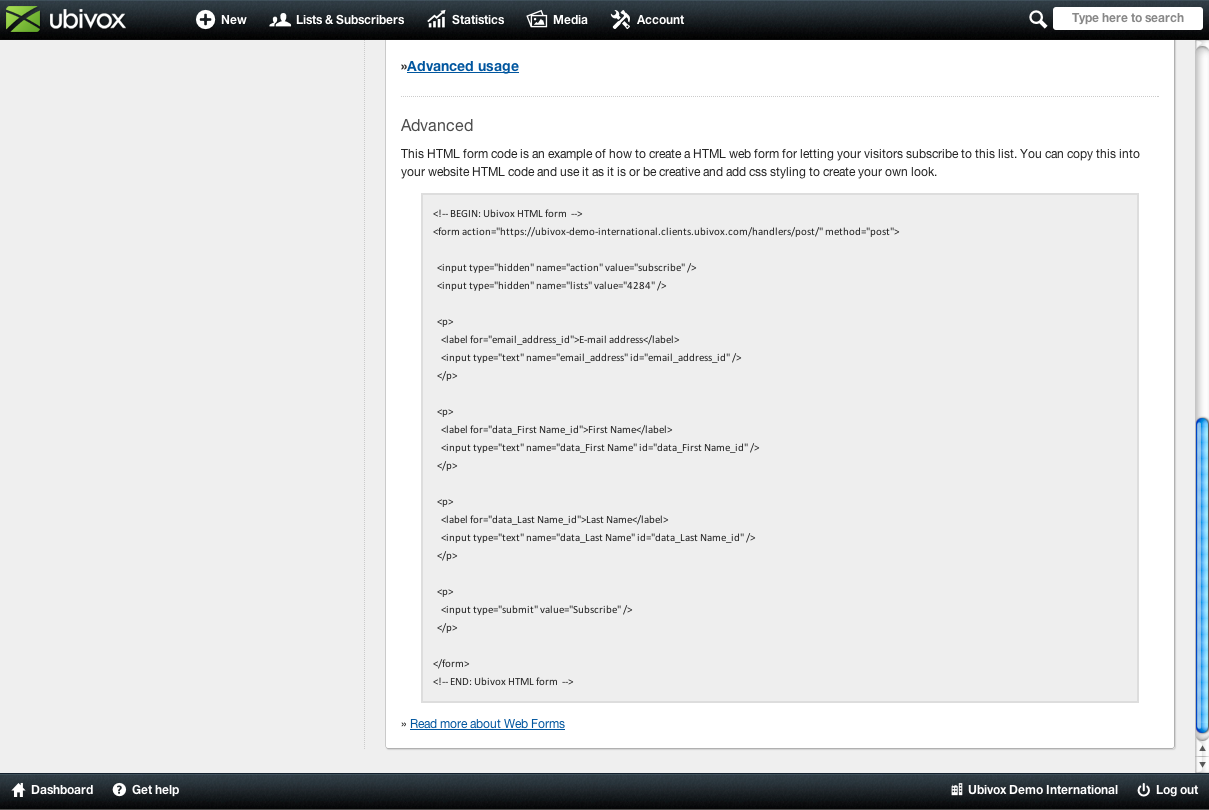
Click the link to see the default formula in Ubivox, which depends on how many data fields you have chosen.
If you instead chooses the advanced usage, in the bottom of the page (recommended), then you can see the HTML code, which can be copied to the website, and visitors can then sign up directly from the website, and you can design the look of the form yourself. Again First Name and Last Name is chosen. The HMTL code will look like this:
You can customize the confirmation pages, which will appear after the subscriber has entered their information. Just add the following to the HTML code:
An example could be:

success_url: The URL used when signing up for the newsletter successfully.
failure_url: The URL if an error occurs.
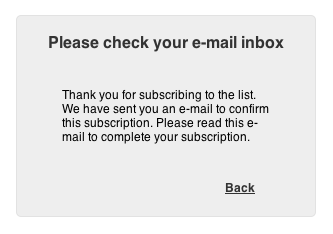
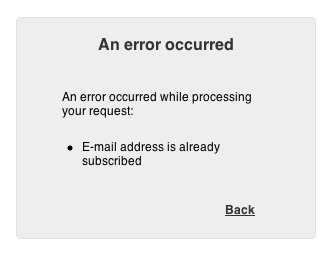
If you do not create your own, the default pages in the system is as follows.
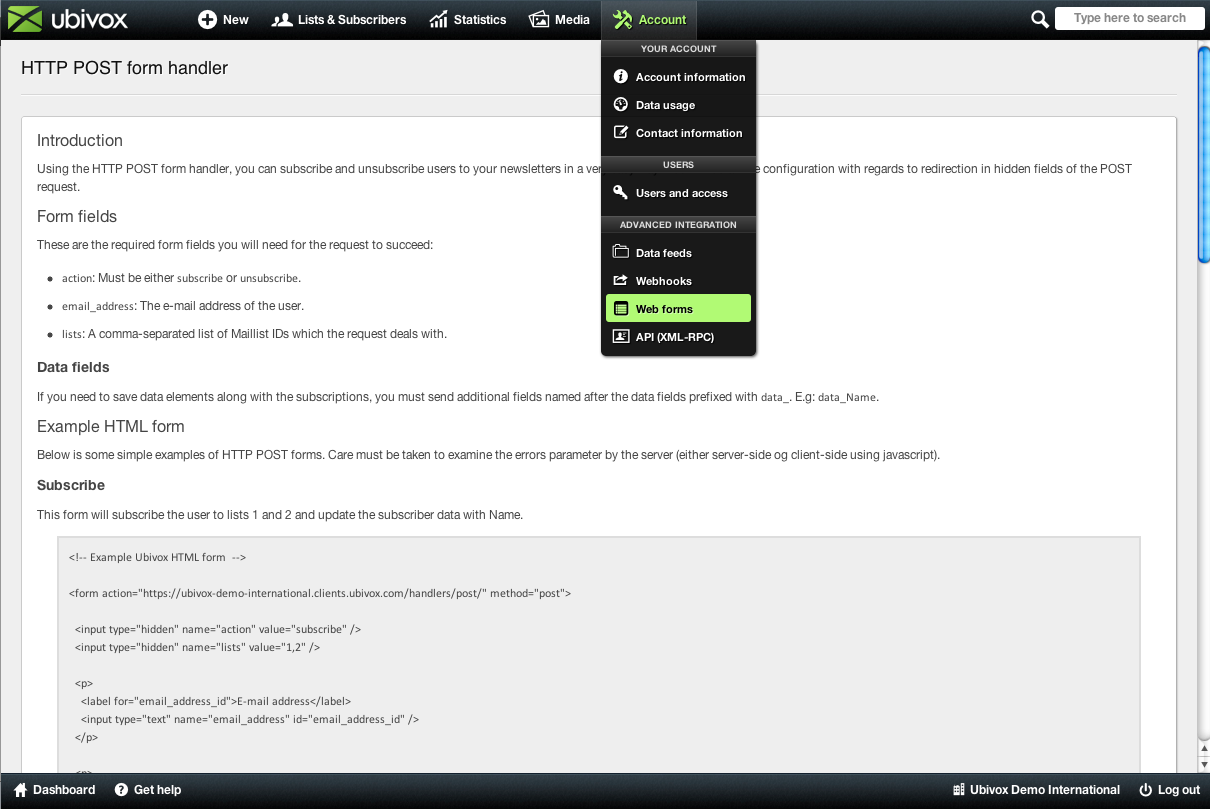
We recommend to read the Web forms guide, found in Account -> Web forms to get an elaboration of web forms.
If you have further questions, please contact support