- Add Content
- Edit text
- Insert link on text
- Edit images
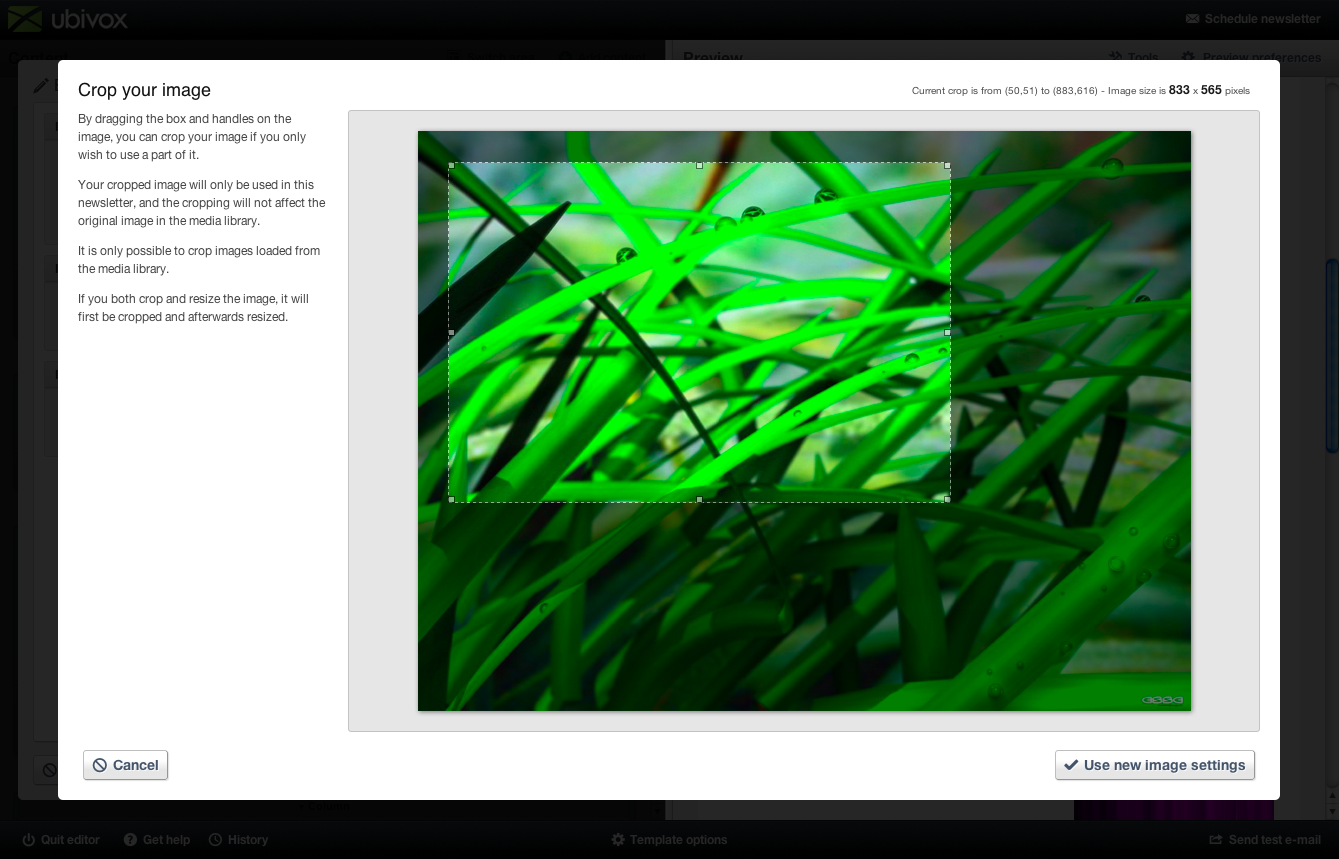
- Cropping
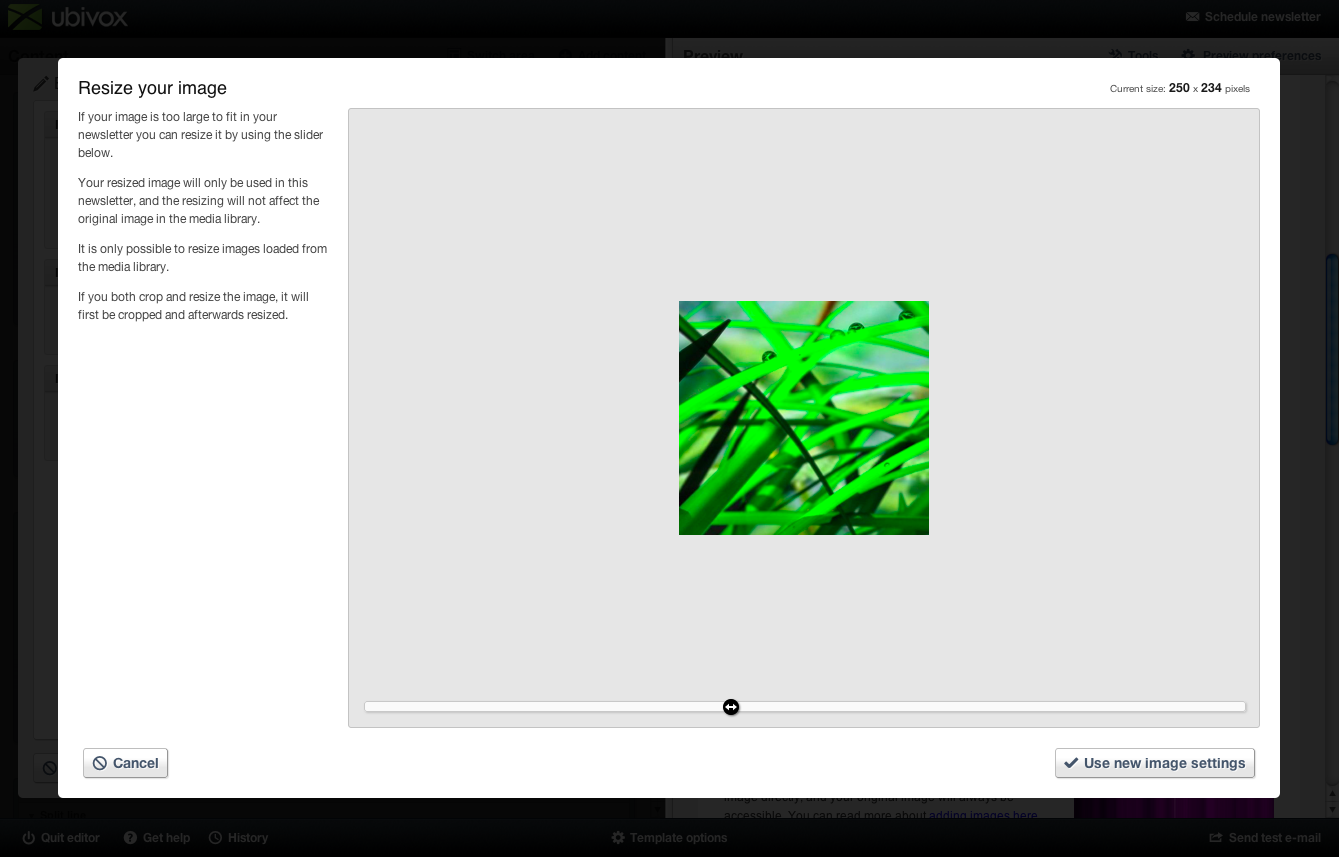
- Resizing
- ALT text
- Links on images
- Template options
- Specific settings on elements in the newsletter
- The other options in the menu
- Undo action
- Tools - highlighting areas in the newsletter
- Preview preferences
- Sending test emails
- Schedule newsletter
This guide gives a deeper understanding of how the Ubivox editor works.
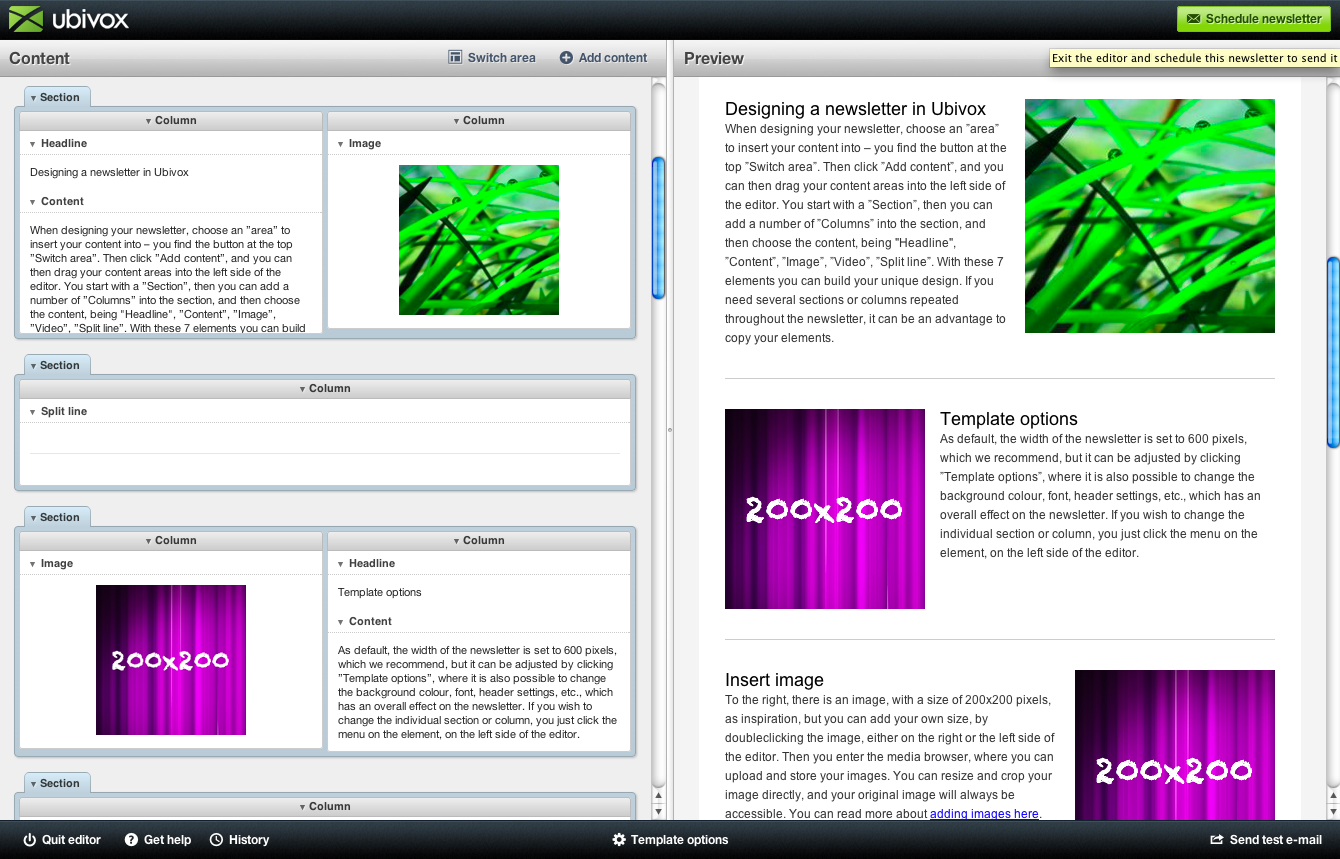
The standard template is made as an inspiration to how you can build a newsletter. Everything can be edited, copied, erased or moved on the left side of the screen, where you can also add more elements by clicking on 'Add content', and then drag the elements you would like.
The bar in the middle can be adjusted to either left or right to adjust the size of the two areas.

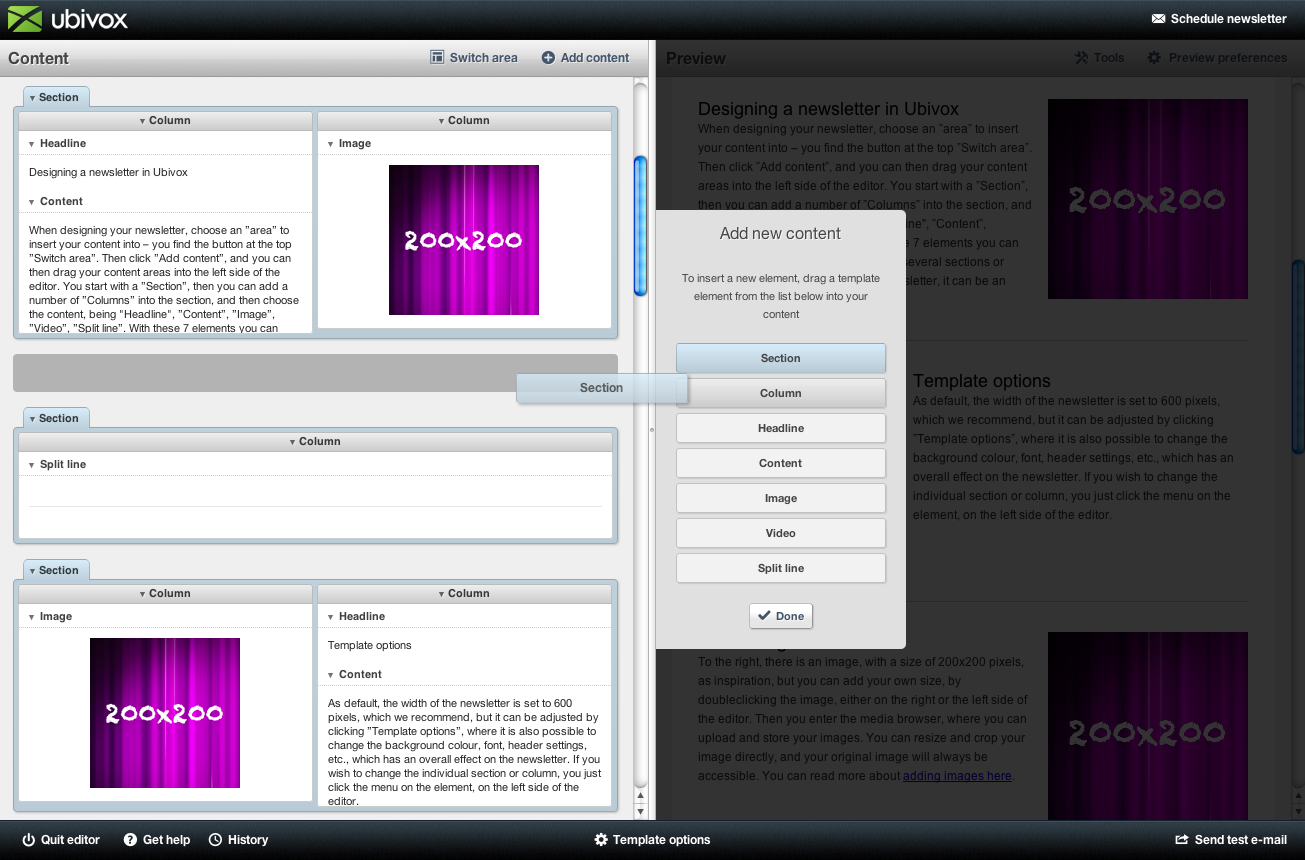
Add Content
To add content, press 'Add content', and then drag the elements into the the relevant areas on the left side. The structure is as follows: insert a section, then a column, and thereafter insert the content areas being: headline, text content, picture or split line.
Edit text
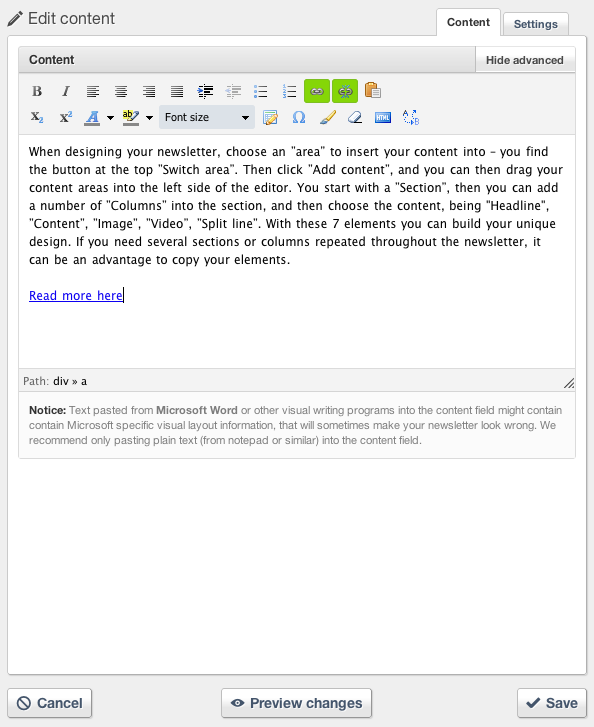
Double click on the text area either or left or right side to enter the text editor. Here you can write and edit with the standard tools known from text programs.
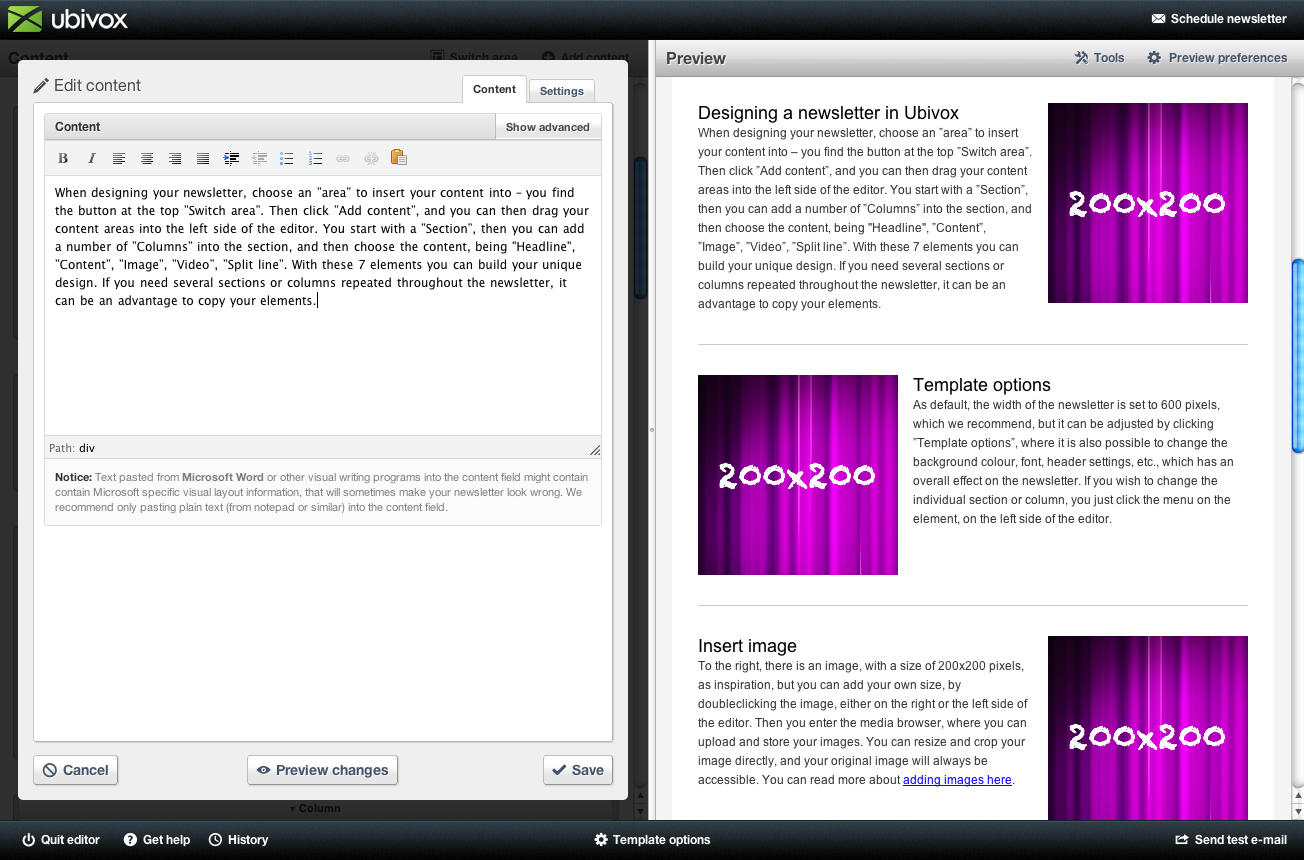
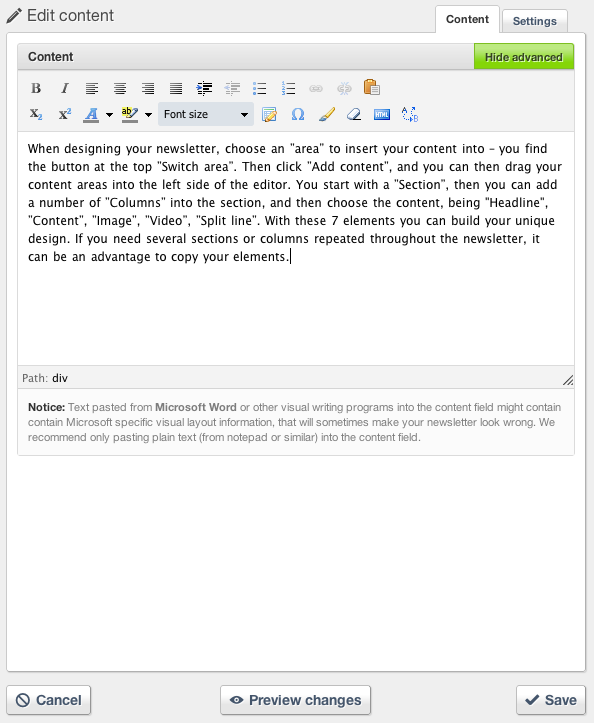
Click 'Advanced' to see the more advanced options in the text-editor, insert symbols, change font size for this specific text area.
Insert link on text
Mark a text string, then the 'chain' symbol is active, and then click it.

You can then insert a relevant link to the text. If you click on Insert e-mail-address, you have the option to insert an e-mail, which will open a "write new e-mail window" on the recipients computer when clicking.
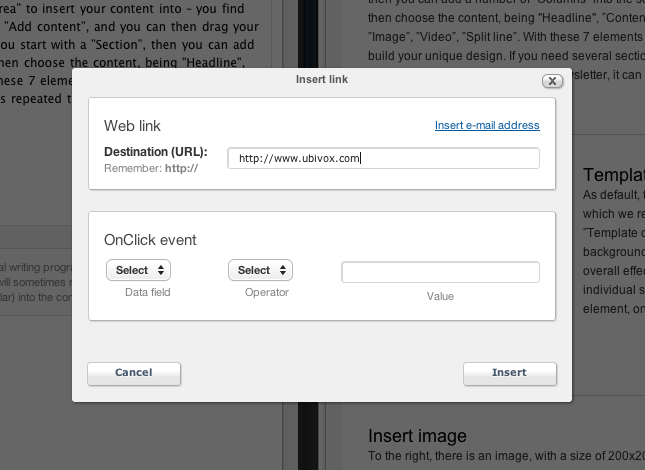
The Onclick function (optional) is an option to automatically collect more knowledge about your subscribers. It is an action you can add to a link, meaning the the value chosen, will be inserted in a specific chosen data field connected to that specific user.
Read more about onclick actions here
The link will then be visible in the text, marked as blue. (The colour on links in the text can also be adjusted in global settings, if relevant).
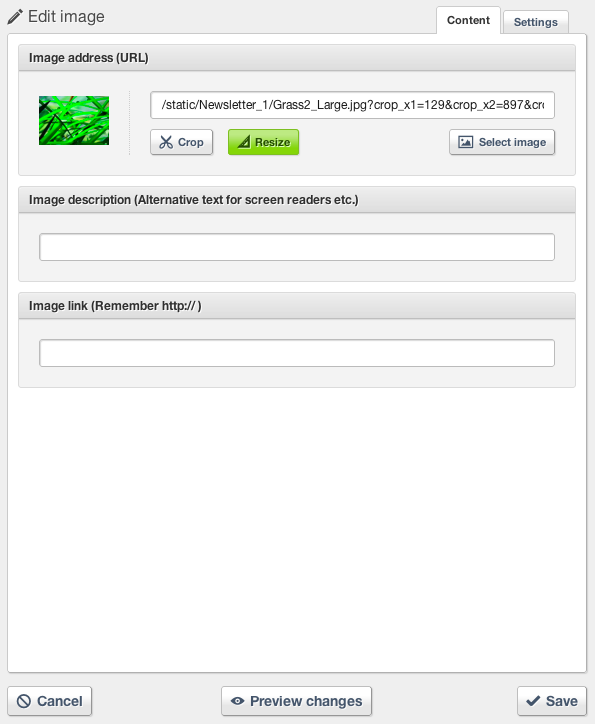
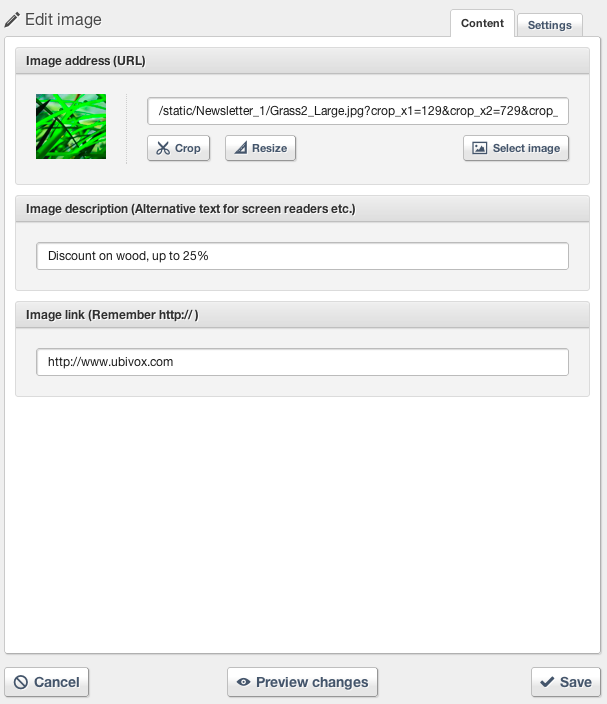
Edit images
To add images, double click the image element, either on right or left side.

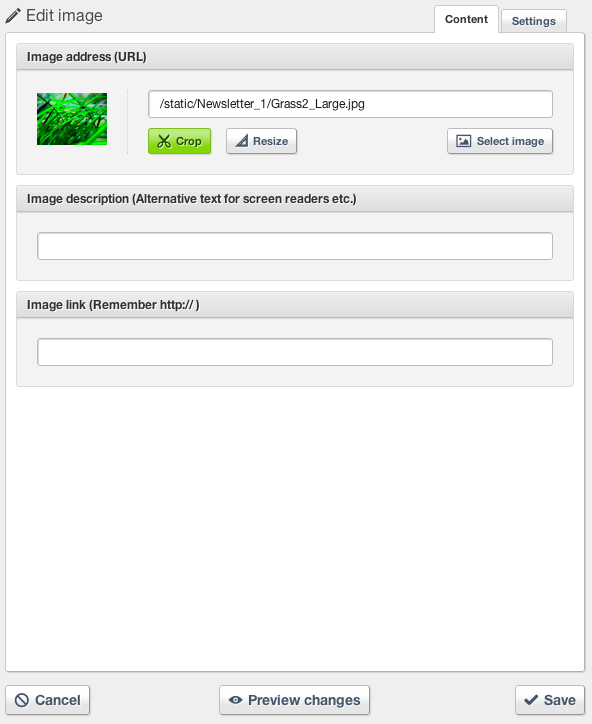
You then enter the Edit image mode, where you can choose picture, crop or resize the image, and add a link to the image.
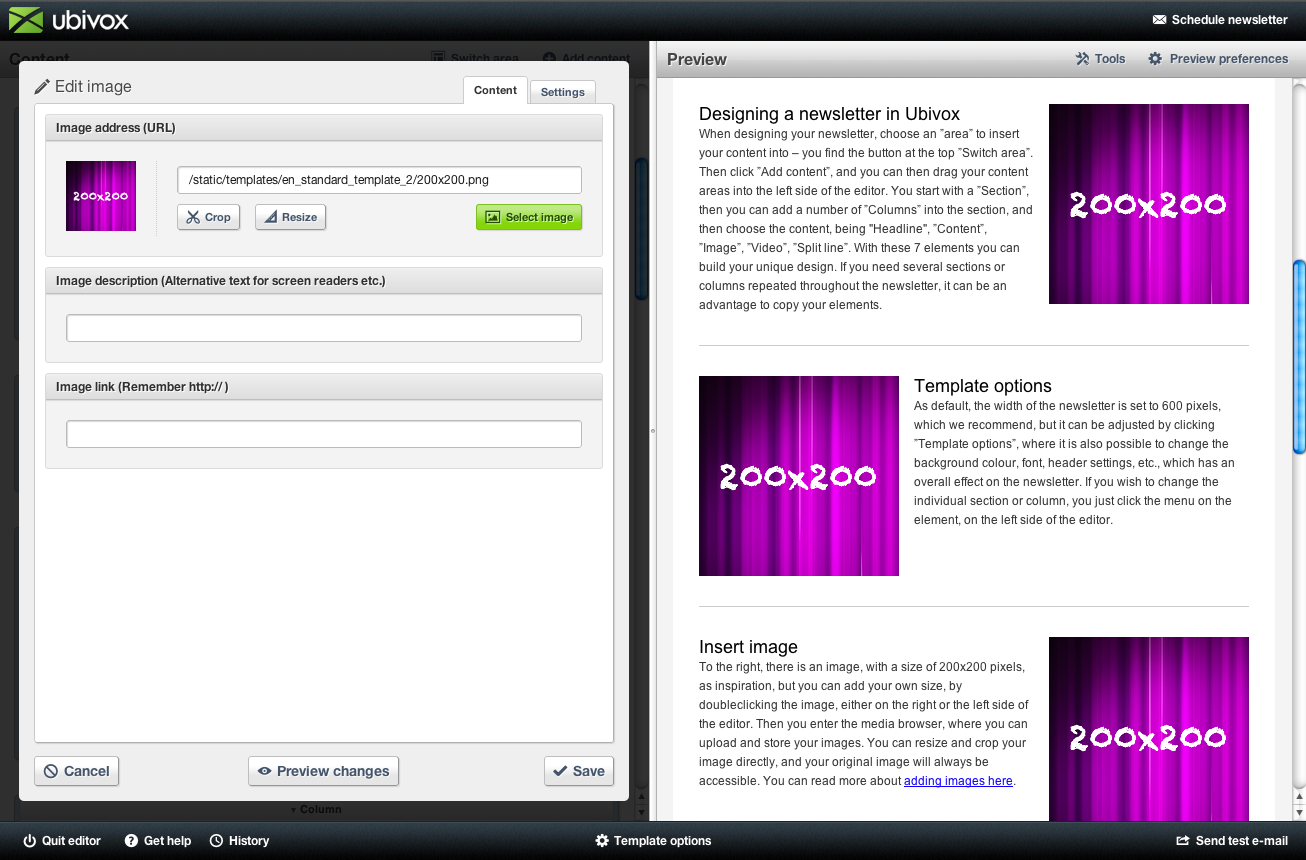
Click Select image, to enter the media library.

Here you can create folders to upload and organize your images in. You can upload the image in full size (max. 1 mb though) and then just choose a part of it or resize it inside the editor.
Cropping
Resizing
Then click save. The image will always be accessible in full size in the media library for later use.
ALT text
We recommend that you write a relevant message in the ALT text. Many mail clients will show this text before and if the pictures are loaded. It can therefore be a good idea to write the message of the image here. This will also be used for blind people reading your newsletter using a screen reader.
Although the ALT text isn't required.
Links on images
In the edit-image menu, you also have the option to add a link to the image, by inserting an URL in the image link area.
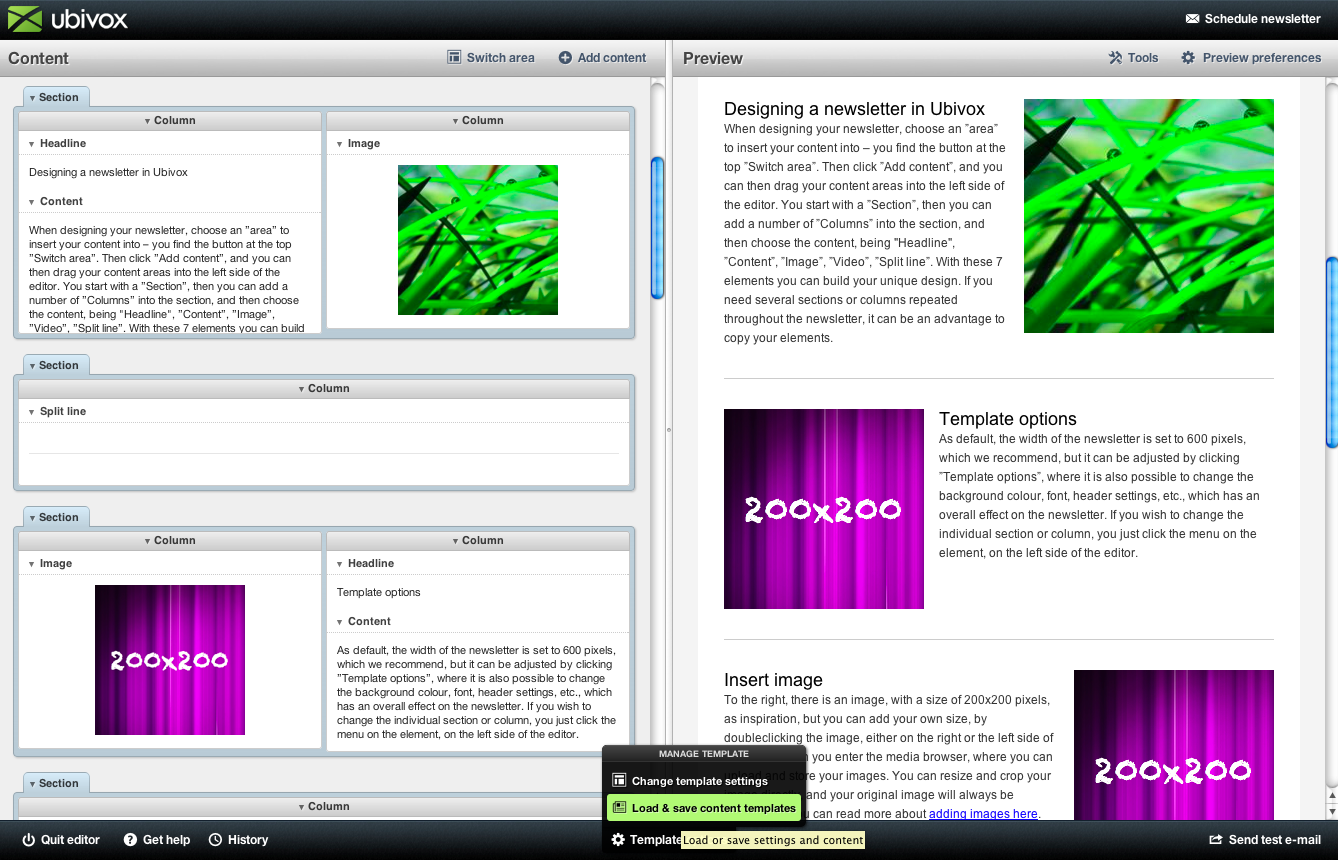
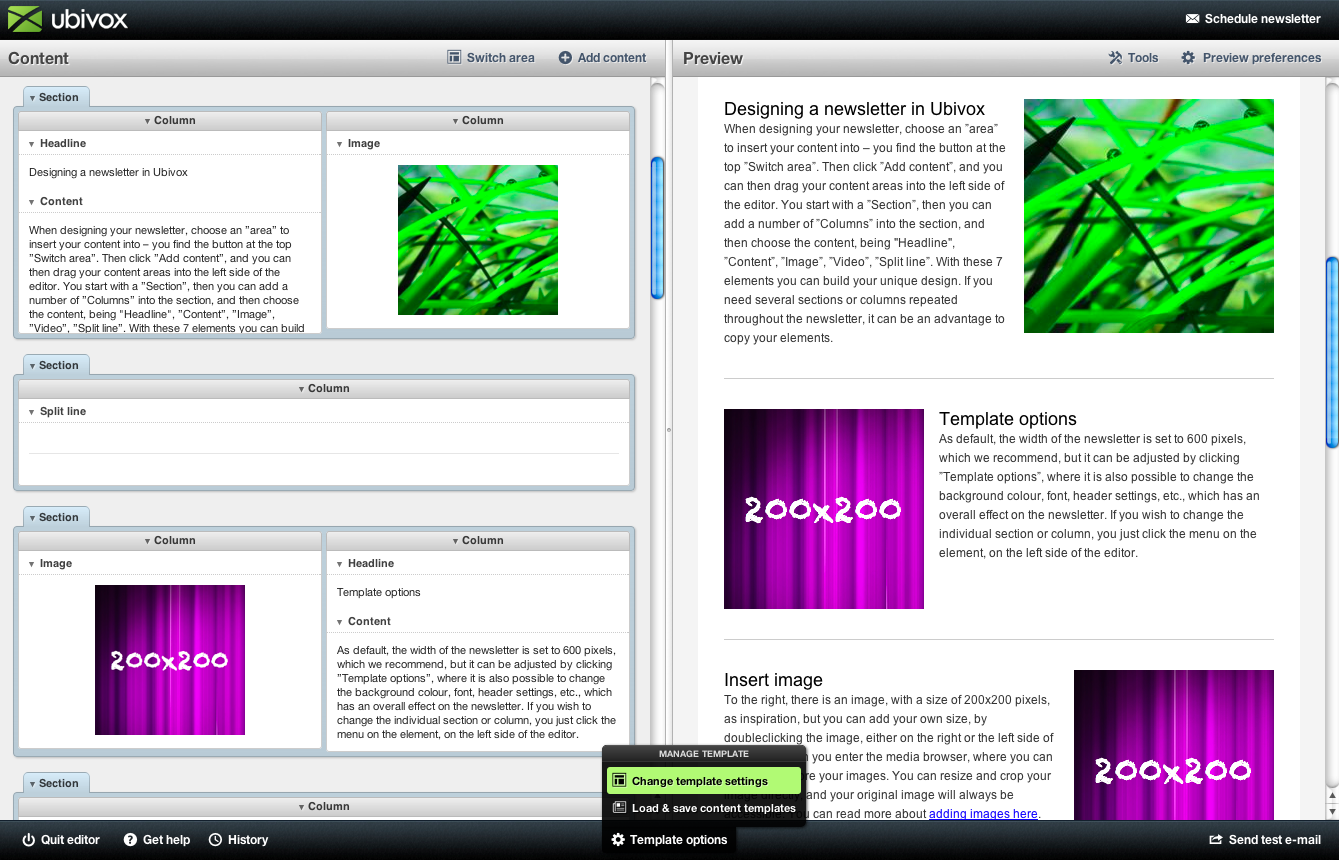
Template options
In Template options you have access to two functions: 1. Load & save content templates and 2. Change template settings.
1. With the Load & save content templates function, you can save a newsletter design as a template for later use. Especially an advantage, when building a course setup.
Enter a name for the template, and click save.

It is then always possible to load this design again from this menu.

2. To change the template settings, click template options -> Change template settings
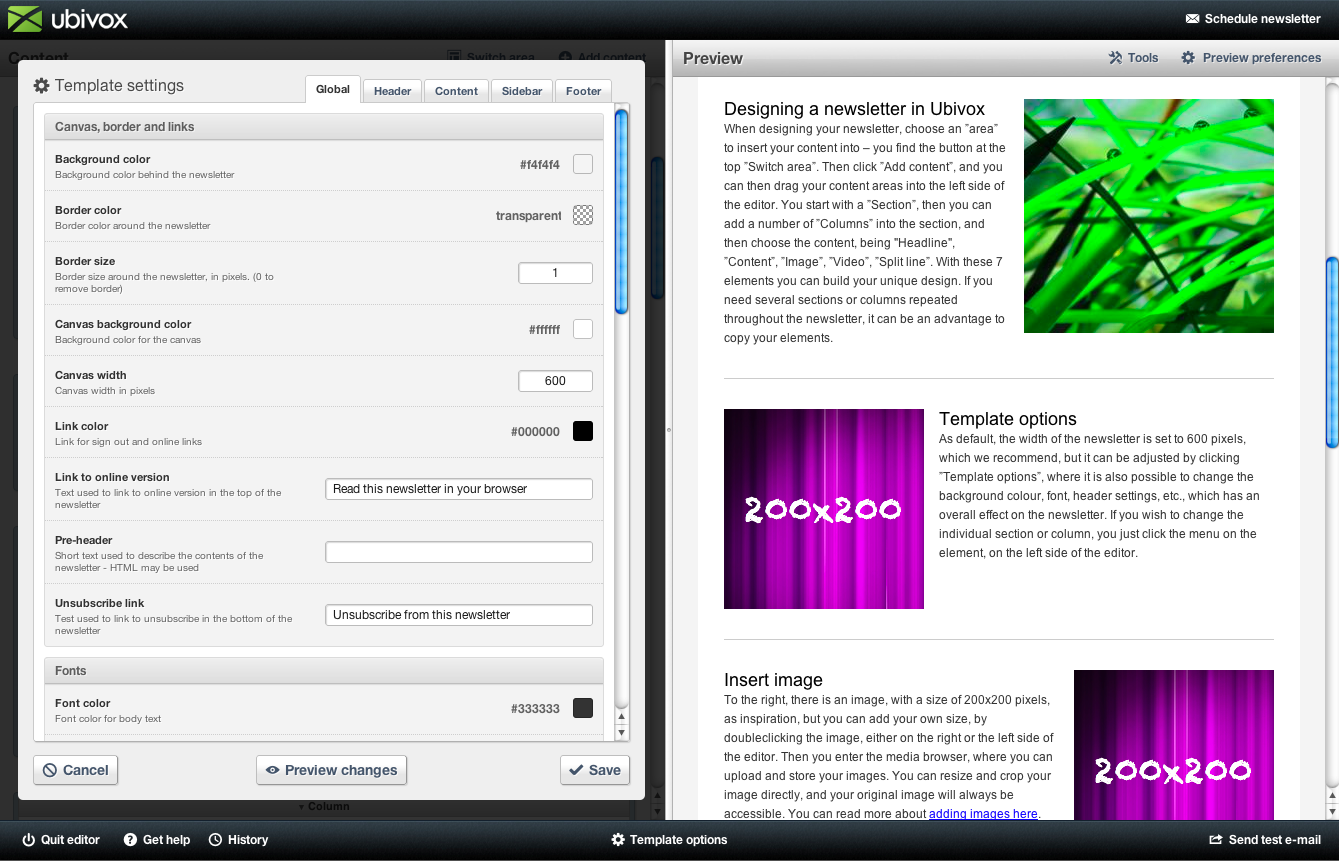
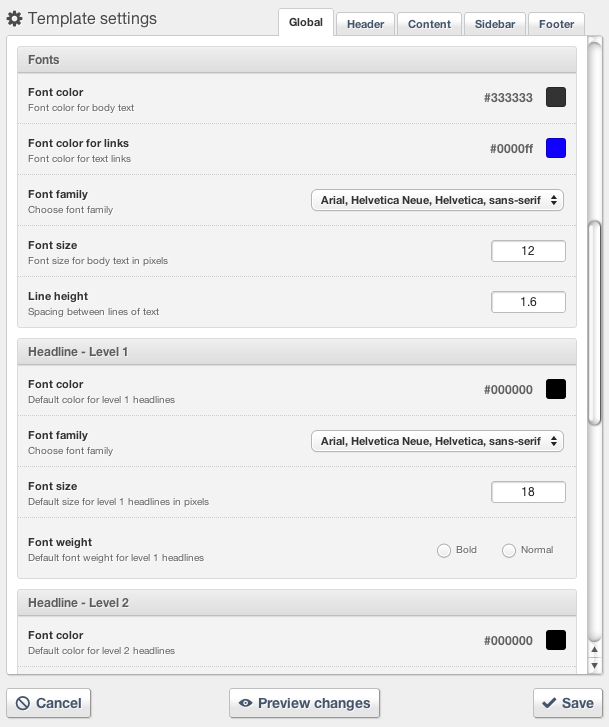
Browsing the global settings in template options for the newsletter, you have the option to change a lot of things, i.e. background color, font, headline settings etc. which all effects the whole newsletter.
You can define settings for headline on 3 levels, thereby making it easy to change the headlines in the whole document from here.
Further down, you have the option to change the width of the newsletter, which has been set to 600 pixel as default, and is what we recommend. The text content of the "Unsubscribe" and "Show in a browser" links can also be edited here. If you wish to erase these, simply delete the text, and the link will disappear from the newsletter. Just remember that the newsletter is required to have some kind of unsubscribe option, either the standard or your own solution.
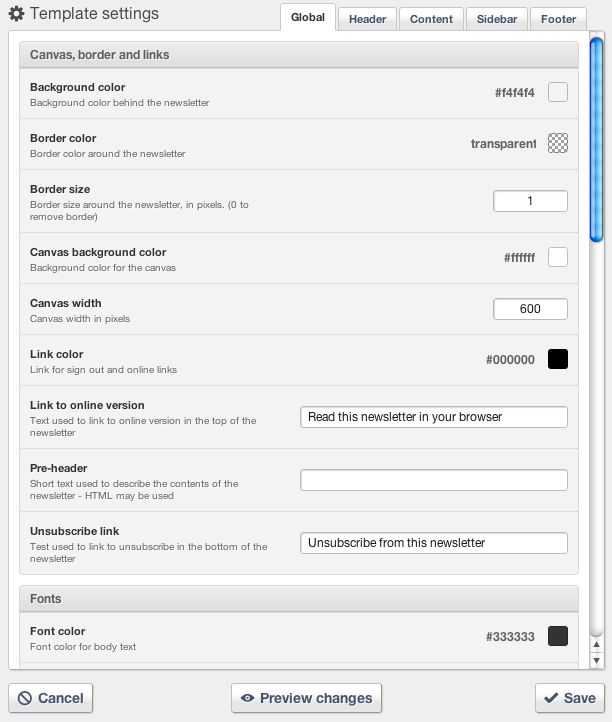
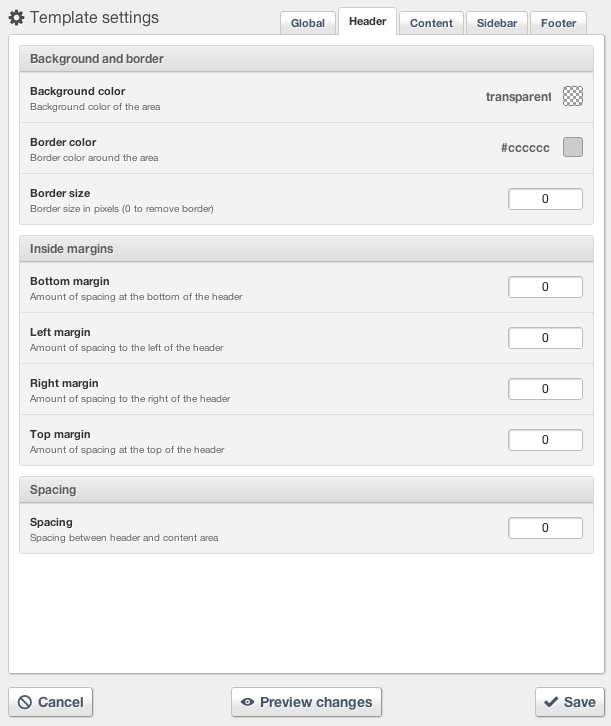
In the other 4 tabs at the top of the menu, you can edit the settings for the specific content areas, Header, Sidebar, Content and Footer. Here you can change margins, frames etc.
Specific settings on elements in the newsletter
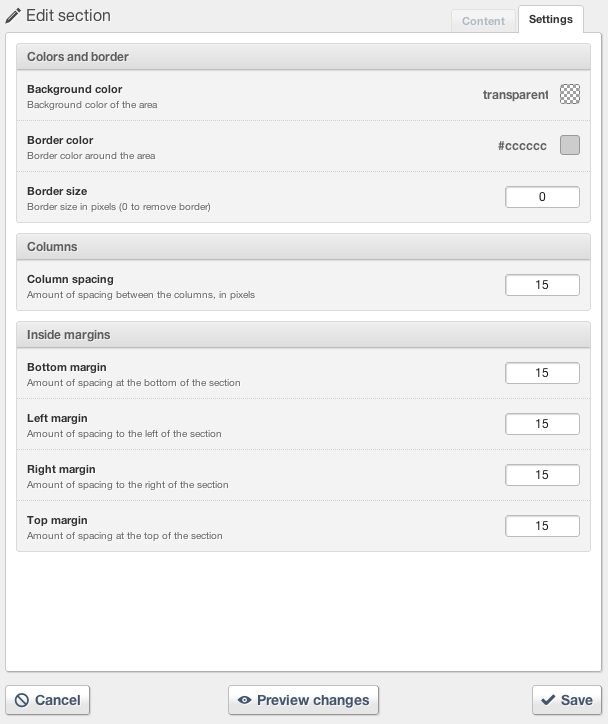
You can change the specific settings on sections, columns or content levels, by clicking the header on each element, on the left side of the editor.
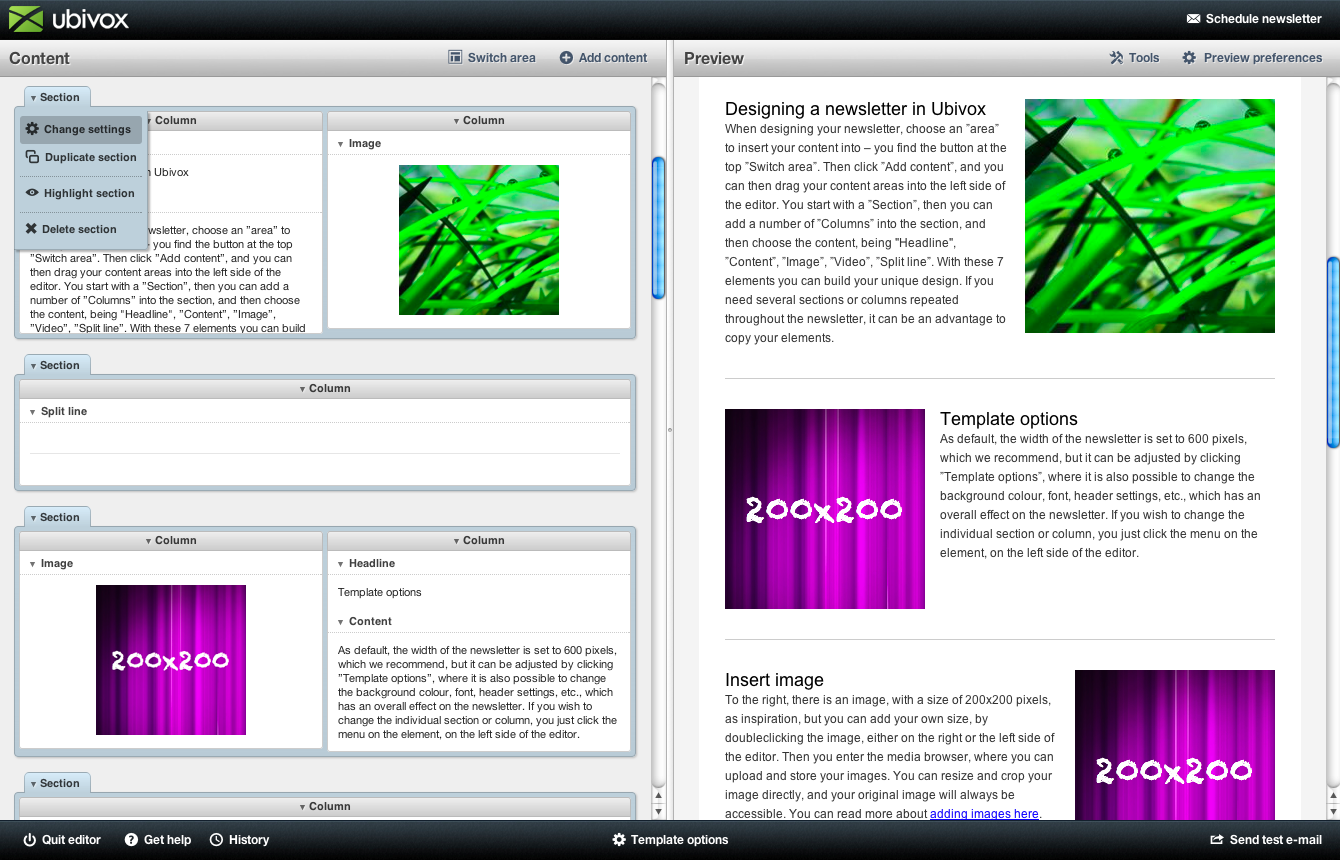
Edit settings gives access to change the elements, with a lot of flexibility. Here is an example of how you change the specific settings for a specific section in the newsletter.
The other options in the menu

You can duplicate the area, i.e. section, column or content area, if you have created a specific design, which has to be repeated in the newsletter it can be a big advantage.
Highlight gives you the option to see which area you are working on, on the right side of the editor.
You also find the Delete option here.
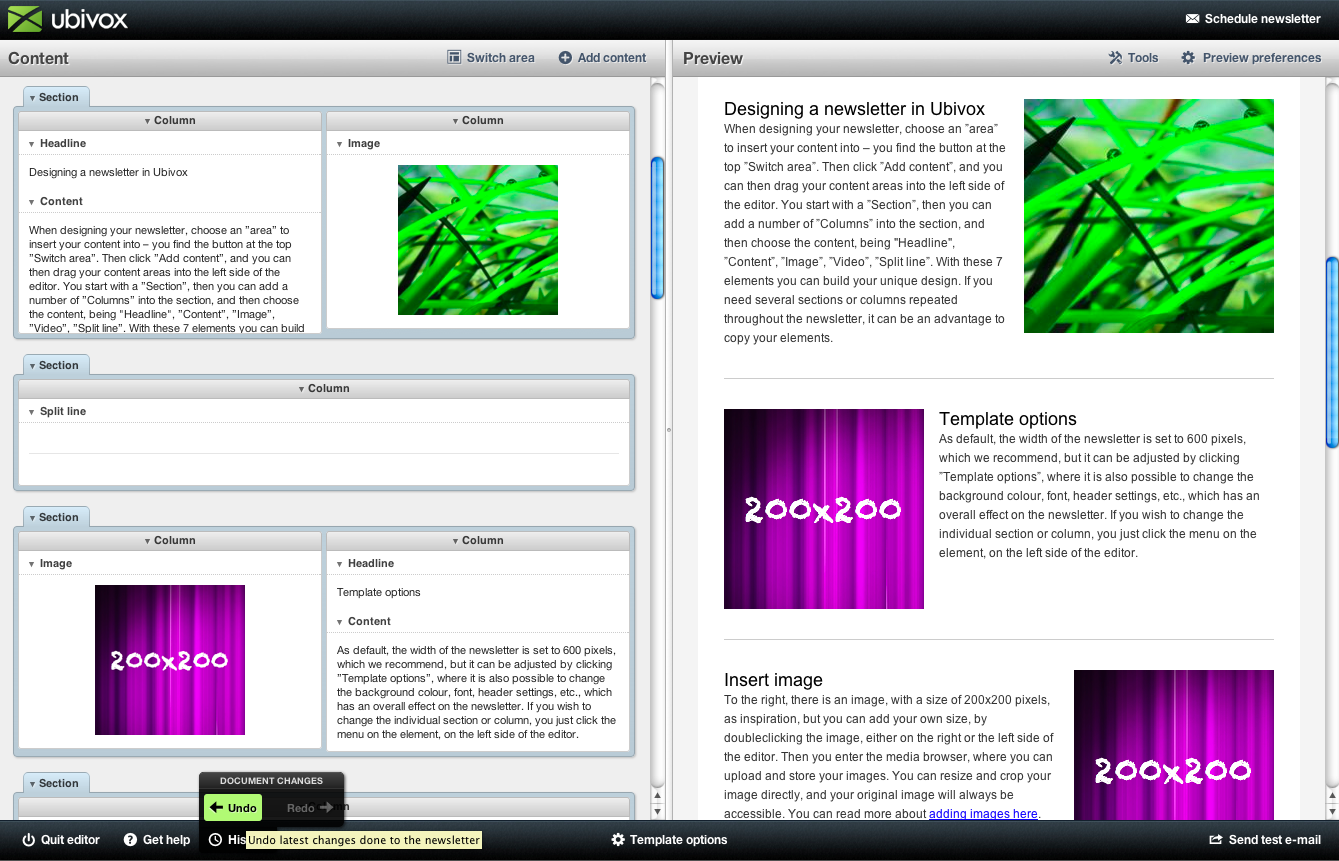
Undo action
Ubivox automatically saves all of your changes, making sure that you don't loose your work.
You can use the undo function in the History menu
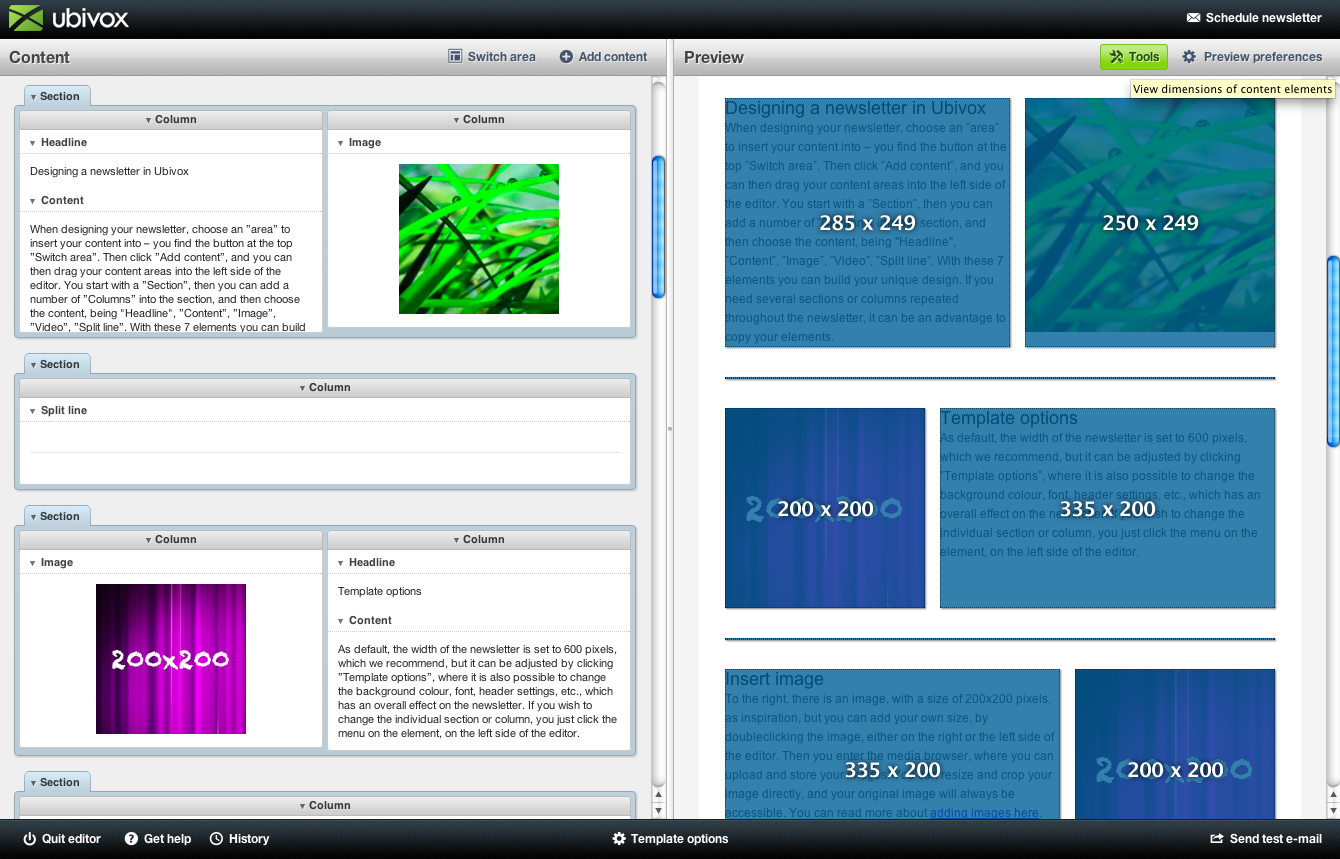
Tools - highlighting areas in the newsletter
Tools can be used for highlighting areas of the newsletter, to show the size of an area.
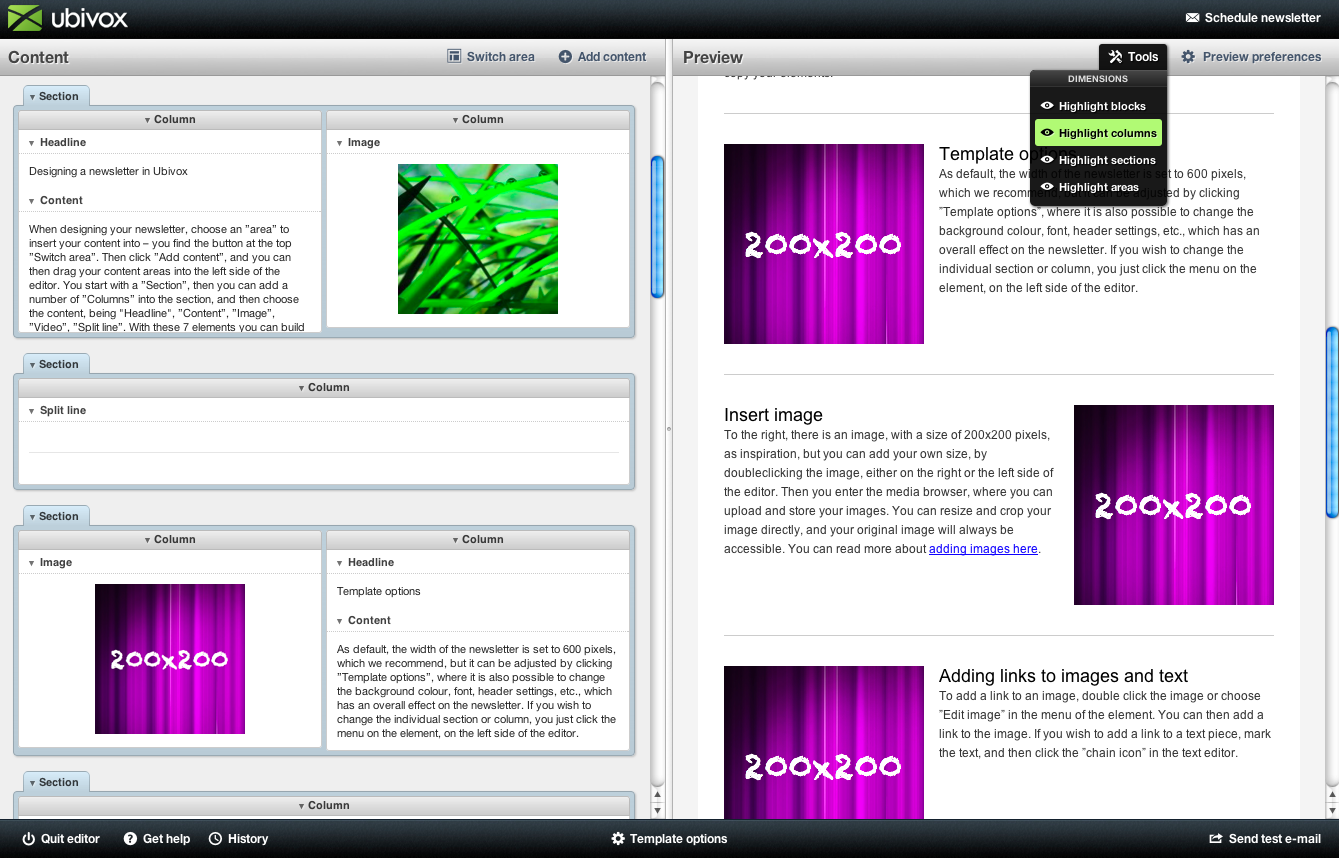
Especially a good tool to see the size of pictures and text areas, to create a better overview of the elements.
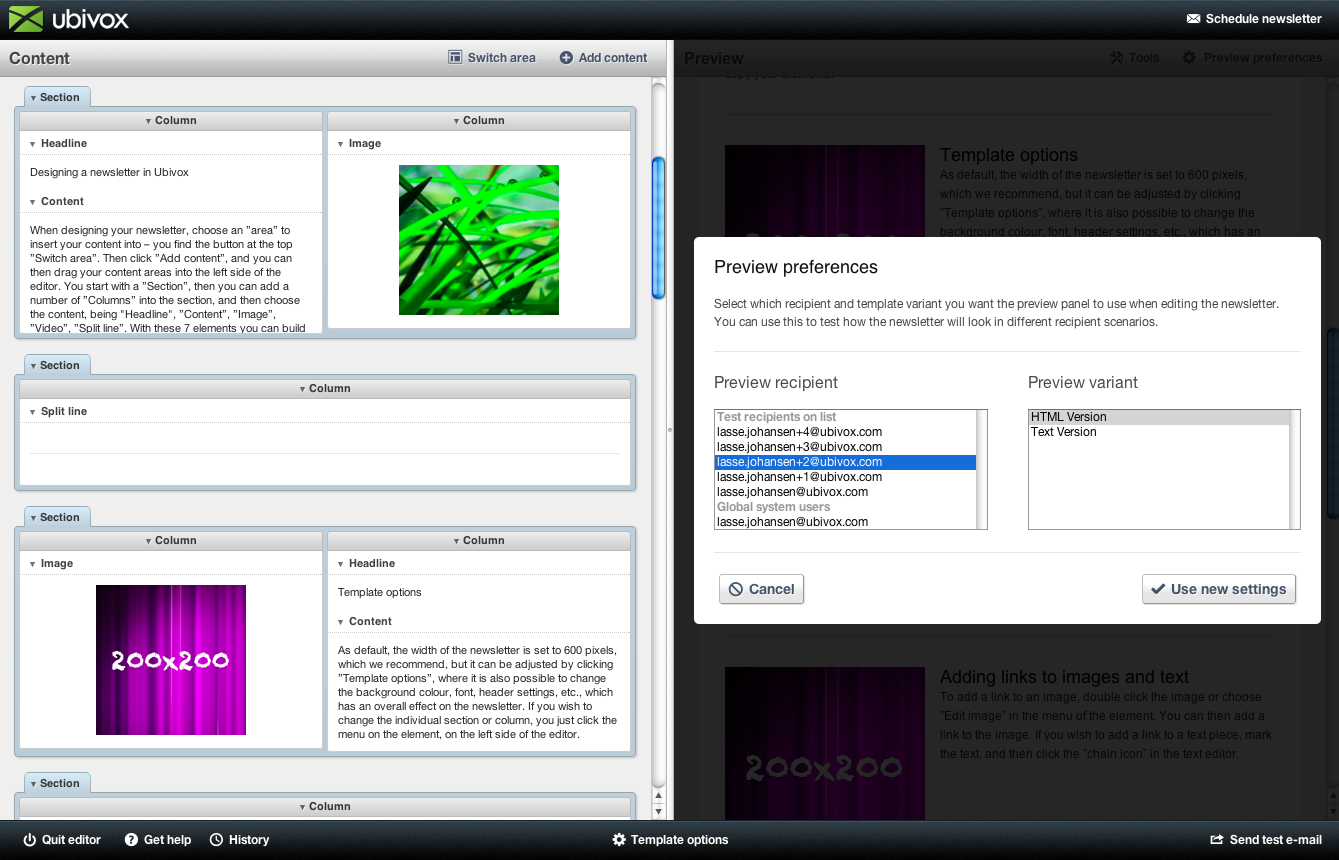
Preview preferences
Next to Tools, the Preview preferences are placed.
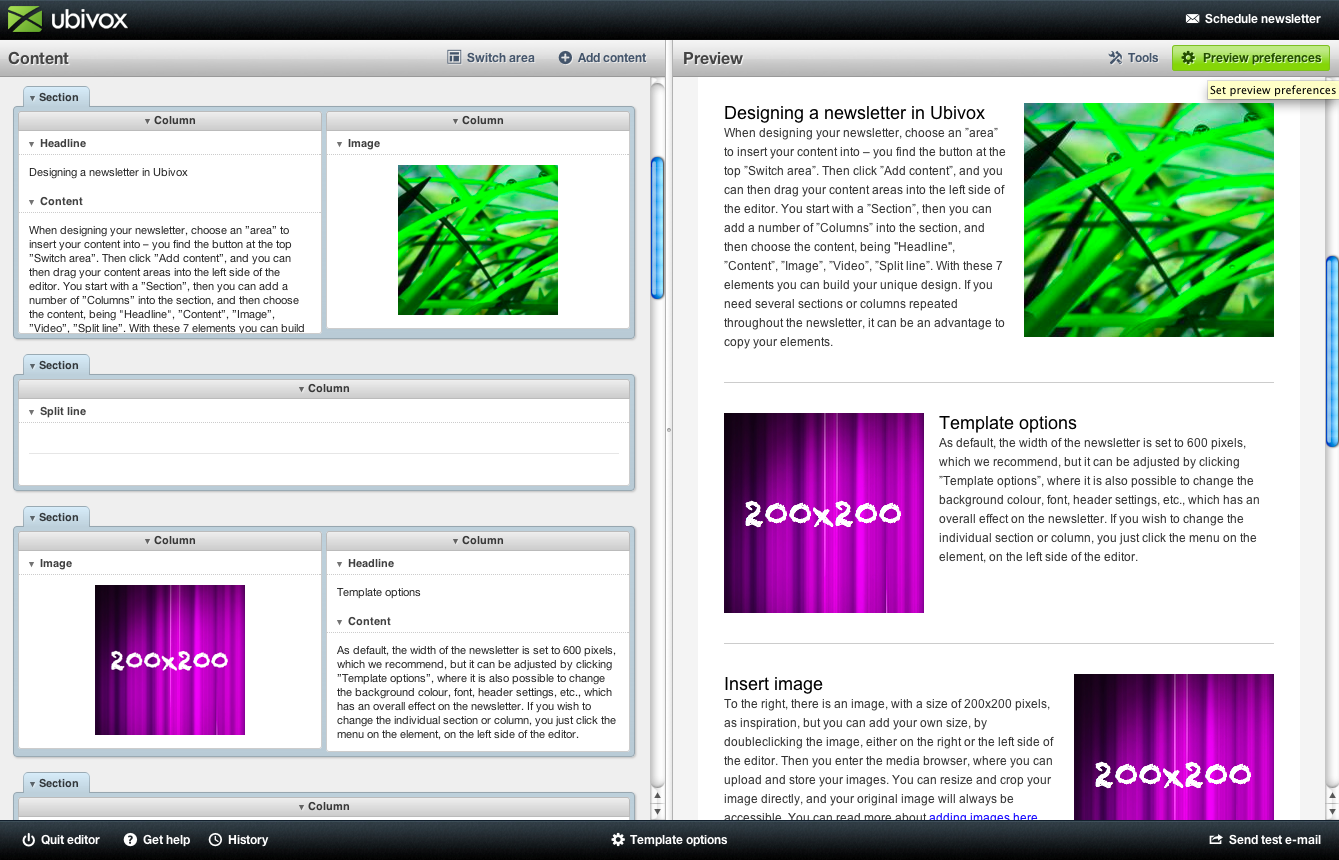
Here you can change the preview settings, for instance to check the different mail merging data or if you want to see the text version of your newsletter, for those who read the text version instead of the HTML version.
Sending test emails
In the bottom right side of the editor, you can choose to send a test email to the available test recipients, chosen when you added for emails to the list. See how to add test recipients here. We recommend to use this option often, to check the design and minor spelling errors etc.

Schedule newsletter
In the top right side of the editor, you have the 'Schedule newsletter' button. Clicking this, you enter the scheduling menu, which is a 5 step process See guide here). We recommend to use this, only when you are ready to send out your final newsletter, to make sure that you do not send any tests to all of your recipients.